
Category: Photo Guides
It’s 2026, and the camera in your pocket is more powerful than the professional DSLRs we were lugging around a decade ago. With massive sensors, AI-driven computational photography, and lenses that defy the laws of physics, your iPhone is a beast. But here’s the truth: even with the best tech in the world, a bad habit will ruin a good shot every single time.
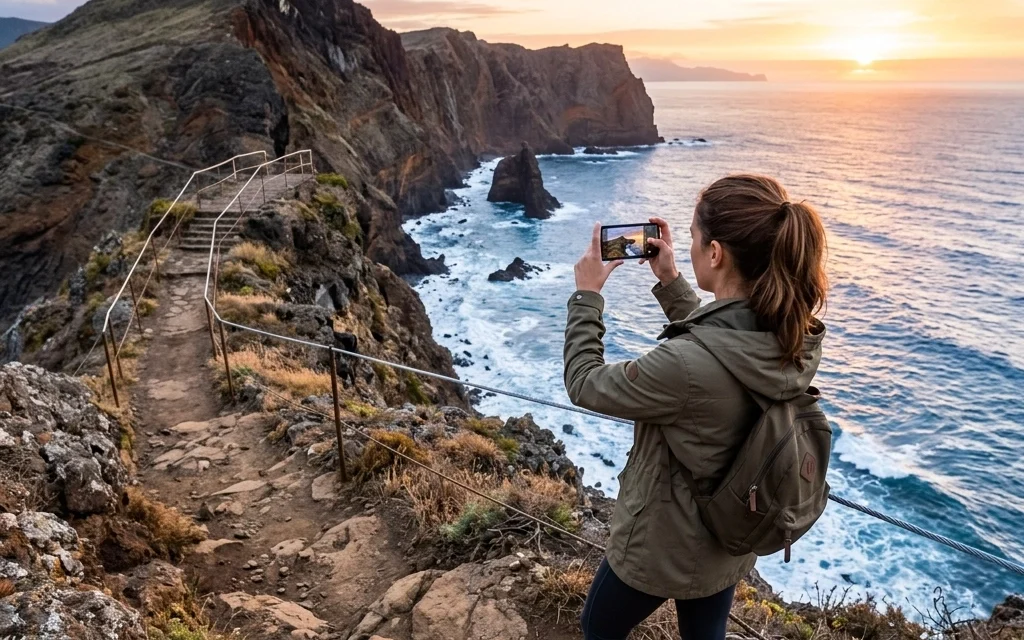
I see it every day. People are out at some of the best photography locations in the world, holding a device worth over a thousand dollars, and they’re making the same basic mistakes that make their photos look like "snapshots" rather than "art."
At Photoguides, we’re all about helping you bridge that gap. You don't need a $10,000 rig to capture the soul of a place; you just need to stop sabotaging your phone. Let’s dive into the seven most common mistakes you’re making with mobile photography and, more importantly, how to fix them today.
1. The "Foggy" Lens Syndrome
This is the most common mistake, and it’s also the simplest to fix. Think about where your phone lives. It’s in your pocket, your bag, or sitting on a café table. Your fingers are constantly touching the glass. Over the course of a day, your camera lens accumulates a fine layer of oil, lint, and fingerprints.
When light hits that smudge, it scatters. This results in "light streaks" coming off streetlamps or a hazy, washed-out look that no amount of editing can truly fix.
How to capture the pro shot:
Make it a reflex. Before you even open the camera app, give that lens a quick wipe. You don’t need a fancy kit: a clean microfiber cloth or even a soft cotton t-shirt will do the trick. You’ll be amazed at how much contrast and clarity you suddenly "gain" just by having a clean piece of glass.
2. Relying Entirely on Autofocus
Your iPhone is smart, but it’s not a mind reader. When you point your camera at a scene, the software looks for faces or the most prominent contrast point to set the focus. Often, it gets it right. But when you’re shooting through branches, in low light, or trying to capture a specific detail, the "auto" setting often misses the mark.
If your focus is off by even a hair, the image loses its impact. A photo without a sharp subject is just digital noise.
How to capture the pro shot:
Take control. Tap the screen exactly where you want the focus to be. On an iPhone, you can also long-press to "AE/AF Lock." This locks the focus and exposure so that even if you move the camera to recompose the shot, your subject stays tack-sharp. This is essential for travel photography tips when you’re trying to capture movement in a busy market or a fleeting sunset.
 1")
3. The "Digital Zoom" Trap
I’m going to be blunt: stop pinching the screen to zoom. Unless your phone has a dedicated telephoto lens (and you’ve hit that "2x" or "5x" button), you are using digital zoom. Digital zoom is just cropping the image in real-time. It doesn't actually bring you closer to the subject; it just enlarges the pixels, leading to grain, blur, and a loss of detail.
In 2026, even with AI upscaling, a digitally zoomed photo will never look as good as a native focal length shot.
How to capture the pro shot:
Use the "sneaker zoom": move your feet. If you can’t get closer physically, take the photo at the 1x focal length and crop it later. You’ll have much more control over the final composition and image quality in post-processing. If you really need that reach, consider looking into essential photography gear like high-quality external lenses. For those looking for a unique cinematic feel, I’ve been loving the Module 8 lens adapter lately.
4. Ignoring the Exposure Slider
Most people let the phone decide how bright or dark a photo should be. The problem? Most phones are programmed to "average out" the light, which often results in blown-out skies or muddy shadows. If you're shooting a sunset, the phone will try to brighten the ground, which completely ruins the colors in the sky.
How to capture the pro shot:
When you tap to focus, a small sun icon appears next to the yellow box. Slide that sun down to lower the exposure or up to brighten it. Under-exposing slightly is almost always better than over-exposing, as it preserves the rich colors and details in the highlights. For professional-grade results, check out some of the camera reviews 2024 and beyond to see how sensor tech handles these dynamic ranges.
 2")
5. Predictable Composition (The "Eye-Level" Habit)
Most people stand up straight, hold the phone at eye level, and snap. This results in the same perspective everyone else has. If you want your photos to stand out, you need to change your point of view. Centering your subject every single time is another way to make a photo feel stagnant and "standard."
How to capture the pro shot:
Switch on the "Grid" in your camera settings. Use the Rule of Thirds: place your subject on one of the intersecting lines rather than right in the middle. More importantly, get low. Crouch down to the ground or find a higher vantage point. Changing the height of your lens by just two feet can completely transform the energy of a photograph. For more on this, I share a lot of my personal techniques over at Shut Your Aperture.
 3")
6. The "One and Done" Mentality
I see people walk up to a beautiful vista, take one photo, and put their phone away. Even the pros don't get the perfect shot on the first click. Light changes, people walk into the frame, or your hand might shake just enough to cause micro-blur.
How to capture the pro shot:
Work the scene. Take multiple shots from slightly different angles. Use "Burst Mode" if there is any movement involved. By taking ten versions of a shot, you give yourself the luxury of choosing the one where the lighting hit just right or the composition felt perfectly balanced. Remember, digital "film" is free: don't be afraid to use it.
7. Over-Reliance on AI "Beauty" Filters
We’re in the era of AI photography trends, and while AI is great for noise reduction, many phone manufacturers over-process images by default. They "smooth" skin until it looks like plastic or over-saturate the grass until it looks radioactive. This kills the authenticity of your travel memories.
How to capture the pro shot:
Shoot in ProRAW if your phone supports it. This gives you the "raw" data from the sensor without the heavy-handed processing. It allows you to edit the photo yourself to reflect how the moment actually felt. Authenticity is becoming the new gold standard in art: if you want to see what I mean, take a look at the fine art collections where the focus is on the raw emotion of the location.
 4")
Putting It All Together: Your New Mobile Workflow
The next time you find yourself at one of those hidden gems or a breathtaking sunset, don't just point and shoot. Take a breath and follow this quick checklist:
- Clean the lens. (Seriously, do it.)
- Find your subject. What are you actually trying to say with this photo?
- Compose with intent. Use the grid, look for leading lines, and try a lower angle.
- Tap to focus. Set your focal point manually.
- Adjust exposure. Slide that sun icon down to keep those colors rich.
- Take the shot (and then five more).
Mobile photography is no longer just for "backups." It’s a legitimate tool for creators. Whether you’re shooting a wedding photography insight piece or just capturing your weekend brunch, these small shifts in habit will move your work from the "deleted" folder to the "framed" wall.
If you’re looking to take your skills even further, we’ve got plenty of resources for you. From educational guides to deep dives into the latest reviews, we’re here to help you see the world a little differently.
Go out there, keep your lens clean, and start capturing the world the way you actually see it.


