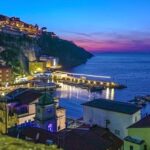
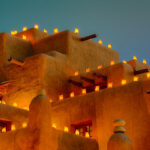
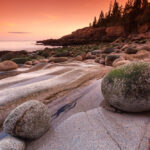
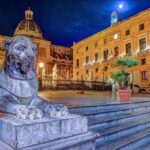
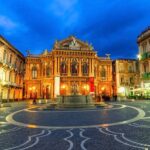
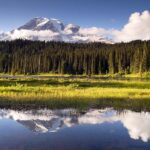
There’s an undeniable allure to the world after dark, a beauty that reshapes everyday settings into scenes of wonder only illuminated by the faint lunar light or glimmers of artificial lighting. An exciting, yet challenging domain of photography, night photography offers an avenue to capture this prodigious beauty on every traveler’s journey. This paper will draw on your path to excellence in taking breathtaking night photographs by delving into crucial elements like camera settings specifically for dusk shots, principles of night scene compositions, and post-production techniques tailored for low light images. Together, they will enable you to capture and bring to focus, the ethereal nocturnal beauty which often evades plain sight.
Understanding Camera Settings for Night Photography
Title: Mastering Camera Settings for Breathtaking Night Photography
With the dark cloak of night come wondrous visuals that cater to the adventurous soul. Yet, these scenes are often elusive, proving challenging to capture through the lens of a camera. Fear not fellow travelers; with the right camera settings, one can immortalize stunning images that echo the allure of the evening. This guide takes you through these crucial settings to help you create atmospheric night photographs.
First up is the concept of aperture. In the realm of photography, an open aperture allows more light to reach the camera’s sensor, making it a significant setting to consider while shooting in low light conditions. A low aperture setting (denoted by a lower f-stop number, ex: f/1.8) in your lens effectively gathers more light. For capturing spectacular night skies and urban landscapes, this becomes handy.
Then there’s shutter speed. Night photography essentially requires longer exposures since the environment is typically low-lit. A slow shutter speed (explained with a high number, like 15” or 30”), translates to the shutter staying open longer, permitting more light. Remember, a sturdy tripod is crucial in avoiding motion blur during long exposures.
Next comes ISO. Simply put, ISO controls your camera’s sensitivity to light. For night photography, you will need a higher ISO to aid in capturing more light. However, an exceedingly high ISO may cause digital noise or grain in your image, affecting the clarity. It’s a marvelous balancing act that requires a keen understanding of your surroundings.
White balance, often overlooked, plays a vital role in how your camera interprets different types of light. Using the auto white balance setting often results in cooler, bluish images. Thus, manually adjusting the white balance to a warmer tone (Kelvin value of around 3000-4000) can create enticing night photos.
Lasty, consider shooting in RAW format. This offers a broader range of post-processing possibilities. Edit contrast, exposure, shadows, warmth, and more with disturbingly little image quality degradation.
Manual mode is perhaps the most favorable for night photography since it allows complete control over settings. Mastering the combination of aperture, shutter speed, and ISO — a collective phenomenon known as the Exposure Triangle — will lead to exceptional night shots. The interaction between these parameters is both complex and exhilarating, opening a realm of exploration for countless travel enthusiasts.
Photography is as a powerful language that tells compelling stories. As adventurous travelers, immortalizing these night tales through our lenses becomes a necessary skill. Implement these camera settings, embark on a venture into the miraculous world of night photography, and surrender to the bewitching allure of the darkness. Let your camera be your guide, cutting through the night’s enigmatic shroud, capturing the secrets of the world usually concealed by the sun’s daylight reign.

Mastering the Art of Composition in Night Photography
Title: “Mastering Limited-Light Photography: Creating Compelling Compositions”
In the world of adventure travel, there’s a unique perk that often goes amiss – photographing in circumstances of minimal light. With the appropriate knowledge and skills, this seemingly daunting backdrop can transform into a photographer’s playground, creating distinctively dramatic and emotion-laden images. The rules might be same but the game differs when the sun sets. Let’s dive deeper into how you can create compelling compositions with limited light, beyond the basic know-how of your camera settings like aperture, shutter speed, ISO, white balance, shooting in RAW format, using manual mode, and applying the principles of the Exposure Triangle.
Focus on Subjects with Good Contrast: Highlight contrasts to define your composition in low-light environments. The dynamic between light and dark can result in captivating images, lending an emotive quality to photographs that might not be visible in normal lighting. Find subjects that hold high contrast against their environment to lead the viewer’s eyes effectively through your shot.
Embrace Negative Space: Limited light photography lends itself to amp up the mystery and the bold appeal of negative space. This method utilizes spare areas within the frame to draw attention to your subject. The availability of minimal light can create a dark canvas for your main source of illumination, making your image a compelling narrative.
Experiment with Silhouettes and Shadows: One of the striking aspects of minimal light photography is the ensuing play of shadows and silhouettes. These can lend a dramatic flair and a sense of enigma to an otherwise standard shot. The key here is to place your subject between your camera and the light-source, thus creating striking silhouettes.
Harness Reflections: Water bodies, glass surfaces, and even wet roads can become your allies in limited light conditions. They serve to double up the available light source and add a shimmering quality to your composition, making it both dynamic and visually fascinating.
Create an Atmosphere: Limited light is not a constraint but a conduit to creativity. It allows photographers to wield light with a greater nuance to unveil hidden mood layers within a scene. Using artificial sources like street lamps and neon signs can add a warm, cozy, or even a surreal mood to your frame, crafting a spellbinding ambiance.
Understand the Power of Post-Processing: Even with perfect shots, post-processing can enhance your creative vision. Use tools to adjust shadows, highlights, contrast, and noise to achieve the desired effects. Aside from these, experiment with color grading to craft the perfect mood for your shots.
Remember, practice sharpens precision, and each frame you capture in minimal light conditions brings you one step closer to mastering compelling compositions. Don’t sidestep the allure of dismal weather or fading twilight — these very conditions might just lead you to your next photographic masterpiece. As the saying goes in the realm of travel, the magic often lies off the beaten path.

Post-Processing Techniques for Night Photography
Post-Processing Techniques that Enrich Night Photography: A Comprehensive Guide
Impeccable night photography is a product of various factors, among them high-level skills in post-processing techniques. These artful manipulations can upgrade a photographer’s work from commonplace to premium quality with just a few tweaks and adjustments.
-
Noise Reduction: Night photography can often result in noisy or grainy images due to the high ISO settings. Employing noise reduction tools in processing software like Adobe Lightroom helps reduce image noise while preserving important details and sharpness. Always use with moderation to avoid effects that may look unnatural.
-
Adjustments in Brightness/Contrast: To enhance the vibrancy of light sources such as neon signs or street lights, adjusting the brightness and contrast can significantly improve the look of your photos. Adjustments can help control the exposure in the imaged, thereby bringing out the true colors of the night.
-
Tonal Curve Manipulation: Using the Tonal Curve feature allows for the modification of brightness, contrast, and color balance in a more detailed manner. This tool lets photographers darken the highlights or brighten the shadows, helping to create more depth and contrast in the photo.
-
Color Corrections: Night photography often records numerous sources of light, each with its color temperature. This can lead to an array of colors in the scenery. To harmonize these color temperatures, make subtle tweaks to the color balance in post-processing.
-
Highlight and Shadow Slider: This technique can help add detail to underexposed, dull areas of the photograph (shadows) and recover overblown, too-bright sections (highlights). Experimenting with these settings will provide further depth to your night images.
-
Use of Radial Filters: Radial filters help to emphasize and manage lighting in different areas of the photograph. This means brightness, contrast, clarity can be varied across the image to focus attention on the key elements of your night scene.
-
Sharpness Enhancements: Digital photos can sometimes lose the sharpness of the original scene, resulting in a blurry representation. Using the sharpening tool can enhance the definition of your photograph, revealing hidden details and textures.
-
Long exposure compositing: For those willing to brave the more technical side of post-processing, merging several long-exposure shots can create captivating star trails or smooth, ethereal-looking water.
Each of these post-processing techniques can be adjusted to various degrees until you achieve your desired effect. Remember, it’s about mastering these skills and developing a keen eye for what each unique night scene needs. Enduring the process of trial and error is indeed frustrating, but the reward of creating your magical world of night lights is far more gratifying.
Finally, keep in mind that post-processing techniques should be viewed as powerful tools to enhance the already impressive composition and technical craftsmanship of your photograph, rather than solutions to fix poor quality images. Here lies the true power of a capable night photographer: to master the art of capturing the night as it is, and then subtly enhancing it. Go forth and capture the magic of the night.

From understanding the best ways to harness your camera’s capabilities, demystifying the intricacies of composition techniques, down to perfecting post-processing ways, you are now equipped to capture the ethereal beauty of the night. Just like the good old saying that it’s about time to put the theory into practice. So, take your camera, venture into the night and let your imagination run wild. Capture the night as you see it, how you feel it, and present it to the world. Who knows, your next masterclass on night photography may just be a shutter click away, hidden under the cover of night waiting for you to seize it.


