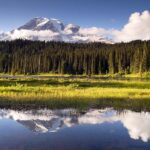
Most travelers want to capture their adventures and create lasting memories through stunning photographs. This guide will empower you with necessary tips to take impressive travel photos, whether you’re in bustling cities or serene landscapes. From mastering lighting to understanding composition, you’ll learn how to elevate your photography skills and ensure that your most memorable moments are documented forever. Embrace your journey, and let your camera help tell your story like never before.
Key Takeaways:
- Understand your equipment and practice using it before your trip.
- Plan your shots by researching locations and best times for lighting.
- Use composition techniques like the rule of thirds for better framing.
- Make the most of natural light, especially during golden hour.
- Capture the culture by including local people and traditions in your photos.
- Don’t shy away from diversifying your shots with different perspectives and angles.
- Edit thoughtfully to enhance your photos while maintaining authenticity.
Mastering the Fundamentals of Travel Photography
To capture stunning travel photos, you must master the fundamentals that lay the groundwork for great imagery. This includes understanding composition, lighting, and storytelling. Explore the rule of thirds, leading lines, and framing techniques to enhance your visual narrative. With a solid grasp of these elements, you’ll not only take captivating images but also learn to convey the emotions and experiences behind each shot.
Essential Gear for Every Adventurer
A versatile camera, lightweight tripod, and appropriate lenses form the backbone of your travel photography kit. Consider packing a mirrorless or DSLR camera for image quality and control, alongside a 50mm prime lens for sharp portraits and landscapes. Don’t overlook a sturdy tripod for low-light situations, and invest in a comfortable camera bag to protect your gear and prevent fatigue during long adventures.
Key Camera Settings You Can’t Ignore
Your camera settings directly influence the outcome of your photos. Start with the aperture to control depth of field—wider apertures like f/2.8 highlight subjects against a blurred background, while smaller apertures (f/11) keep more of the scene in focus. Adjust the ISO based on lighting conditions; low ISO (100-400) is ideal for bright environments, while higher values (800-3200) prevent motion blur in dim conditions. Pay attention to shutter speed to freeze action or create motion blur; a speed of 1/250s works wonders for most scenarios.

The Art of Composition: Framing Your Journey
Mastering composition transforms your travel photos from mere snapshots into artistic expressions. Paying attention to how you frame each shot can convey the essence of your adventure and evoke emotions in viewers. Utilize the environment around you, combining elements like foreground and background, to create depth and interest in your images. Imperfect moments often yield the most compelling compositions, so keep your eye open for unique angles and unexpected details that tell a story.
Rule of Thirds and Beyond: Creative Framing Techniques
The Rule of Thirds is foundational in photography, placing your subject along imaginary gridlines to create balance. Positioning key elements off-center can generate tension and intrigue, drawing the viewer’s eye across the frame. Beyond this, experiment with symmetry and negative space to emphasize your subject further. Don’t shy away from breaking norms—embracing spontaneity can yield fascinating results that highlight your unique perspective on your journey.
Leading Lines and Perspective: Making Your Photos Pop
Utilizing leading lines enhances the visual flow in your photos, guiding the viewer’s eye to focal points. Roads, rivers, architectural features, and natural elements serve as effective lines, creating depth and dimension. Angling your camera to capture these lines can elevate the composition significantly. Experimenting with perspective—whether shooting low to the ground or capturing high angles—adds an element of surprise and intrigue that can turn an ordinary scene into an extraordinary image.
Incorporating leading lines and unique perspectives gives your travel photography a dynamic quality that captivates audiences. For example, photographing a winding road that leads into the horizon not only invites viewers to imagine where it goes but also adds a sense of adventure. Similarly, shooting from a lower angle can exaggerate foreground elements, making them feel more prominent and engaging. Use contrast between lines and shapes to create visual tension, ensuring your images remain striking and memorable.

Capturing the Essence: Telling Stories Through Images
Every photograph serves as a window into the moments and emotions of your travels, offering a narrative that transcends words. To truly capture the essence of a destination, focus on details that reflect its culture and spirit. Seek out unique perspectives that highlight not just the scenery, but also the interactions between locals and their environment. By doing so, you create images that evoke a sense of place and invite viewers to experience the story behind each shot.
Candid Moments vs. Posed Shots: When to Apply Each
Candid moments often reveal authentic emotions and spontaneous interactions that posed shots may lack. You’ll want to capture candid images when exploring vibrant markets, local festivals, or joyous gatherings. However, posed shots can be powerful when highlighting significant landmarks or when you aim to create a polished portrait of a place. Understanding the right balance between these two styles enhances your storytelling and breathes life into your travel album.
Using Light and Shadow to Convey Emotion
Light and shadow play critical roles in the mood of your photographs, shaping the emotional response of viewers. Directional light can intensify feelings of warmth or isolation, depending on its source and angle. For instance, soft morning light enhances the tranquility of a serene landscape, while harsh midday sun creates stark contrasts that can evoke tension. Experimenting with shadows can add depth, highlighting movement and creating intrigue. Each choice you make regarding light can transform a simple snapshot into a compelling narrative.
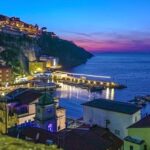
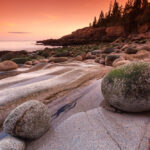
Consider incorporating the golden hour into your shooting schedule for the most enchanting effects. The low sunlight at sunrise or sunset casts a dreamy glow, enhancing colors and textures in your images. Shadows can also establish layers in your composition, creating a sense of depth and directing the viewer’s eye to focal points. For example, capturing a silhouette against a vibrant sunset often yields striking visual storytelling. Utilize these elements to evoke specific feelings and reinforce the story you aim to tell through your travel photography.

Navigating Cultural Sensitivity in Photography
Respecting the diverse cultures encountered during your travels enhances your photography while establishing meaningful connections. Navigating cultural sensitivity involves understanding and honoring the values, beliefs, and traditions of the places you visit. Ensure that your lens captures not just the surface beauty but also the underlying stories that define a community. Being aware of local customs can profoundly impact your experience, ultimately leading to more authentic images.
Respecting Local Customs: The Do’s and Don’ts
Before photographing in any new location, familiarize yourself with local customs. Always seek permission before capturing images of people, especially in culturally sensitive areas. Avoid using flash photography in religious or ceremonial sites, and be mindful of dress codes, which may require modest attire. Do ask questions about traditions and engage with locals to gain insight into their culture, while not intruding or imposing your own values.
Engaging with Subjects: Building Trust While Traveling
Connecting with the subjects of your photographs builds trust and enhances the authenticity of your images. Take time to converse, listen, and show genuine interest in their stories. This approach fosters an environment where subjects feel comfortable and respected, resulting in more evocative photographs. Cultivating these relationships can lead to unexpected opportunities, revealing unique aspects of a culture often overlooked by casual observers.
Investing time in developing rapport can yield significant benefits for your travel photography. Initiating conversations with local individuals can reveal fascinating stories and cultural nuances that enrich your images. Share a small token, like a smile or gratitude, as a gesture of appreciation, which might encourage more open interactions. Ultimately, this trust-building process creates a collaborative experience, allowing you to capture images that resonate deeply with both you and your audience, while reflecting the essence of the people and places you visit.
Post-Processing and Refining Your Travel Images
Post-processing enhances the impact of your travel images, allowing you to convey the original emotion and beauty captured during your adventures. Use this phase to correct exposure, adjust colors, and apply cropping or other techniques to finalize your images. A well-edited photo not only reflects your artistic intent but also intrigues and engages your audience.
Essential Editing Software and Techniques
Popular editing software like Adobe Lightroom, Photoshop, and Capture One provide comprehensive tools for refining your travel photos. Basic adjustments should include exposure correction, color balance, and sharpness enhancement. Experimenting with filters and presets can also save time while achieving a unique style reflective of your travel experiences.
From Raw to Refined: A Step-by-Step Editing Workflow
An efficient workflow transforms your images from unprocessed files to stunning visuals. Start by importing your RAW files into your editing software, followed by making basic adjustments for exposure and color corrections. Focus next on cropping for composition, applying any necessary retouching, and finally, exporting in various formats for publication or sharing online. This organized approach ensures consistency across your visual storytelling.
From Raw to Refined: A Step-by-Step Editing Workflow
| Step | Description |
| Import RAW Files | Load images into the editing software. |
| Basic Adjustments | Correct exposure, white balance, and contrast. |
| Crop and Compose | Refine framing to improve composition. |
| Retouching | Eliminate blemishes and distractions. |
| Export | Save in appropriate formats for sharing. |
Final Words
Now that you have explored the necessary tips in ‘The Ultimate Guide To Travel Photography – Tips For Every Adventure’, you are equipped to elevate your photography skills on every journey. Focus on understanding your surroundings, experimenting with different techniques, and capturing genuine moments. Utilize the advice provided to tell compelling stories through your images, ensuring your travel memories are beautifully preserved for years to come. Embrace each adventure with enthusiasm and let your creativity shine through your lens.
FAQ
Q: What equipment is necessary for travel photography?
A: A good camera (DSLR or mirrorless), a versatile lens (such as a 24-70mm), a tripod, extra batteries, and a memory card are crucial. Consider a polarizing filter for landscape shots and a lightweight backpack for easy transport.
Q: How do I capture the best lighting for my photos?
A: The golden hour, shortly after sunrise and before sunset, provides soft, warm light. Midday light can be harsh; utilize overcast days for even lighting. Experiment with backlighting for added drama in your shots.
Q: What composition techniques should I use in travel photography?
A: The rule of thirds is effective for balanced compositions. Leading lines can guide viewers’ eyes toward the subject. Framing using natural elements adds depth, while varying angles and perspectives keeps images interesting.
Q: How can I make people feel comfortable in my travel photos?
A: Approach subjects gently and respectfully. Engage in conversation to build rapport before taking pictures. Capture candid moments instead of posed shots to reflect genuine emotions and interactions.
Q: What should I consider when editing my travel photos?
A: Focus on enhancing exposure, contrast, and color balance. Crop to improve composition while maintaining key elements. Use editing software to remove distractions but avoid over-editing to keep the essence of the photo intact.
Q: How can I stay safe while taking travel photographs?
A: Be aware of your surroundings and avoid displaying expensive equipment in public. Research locations to understand potential risks. Consider traveling in groups and remaining vigilant, especially in unfamiliar areas.
Q: What are the best tips for photographing landscapes?
A: Scout locations in advance to find ideal viewpoints. Use a wide-angle lens to capture expansive scenes. Include interesting foreground elements for depth, and experiment with different times of day for varying light conditions.


