
Category: Photo Guides
There is something truly mystical about the Florida Everglades. It isn’t just a swamp; it’s a slow-moving river of grass, a prehistoric landscape where modern-day dinosaurs roam and colorful birds dance through the air. If you’ve ever scrolled through professional galleries and wondered how photographers get those tack-sharp shots of a Great Blue Heron mid-strike or an alligator’s eye peering through the duckweed, you’re in the right place.
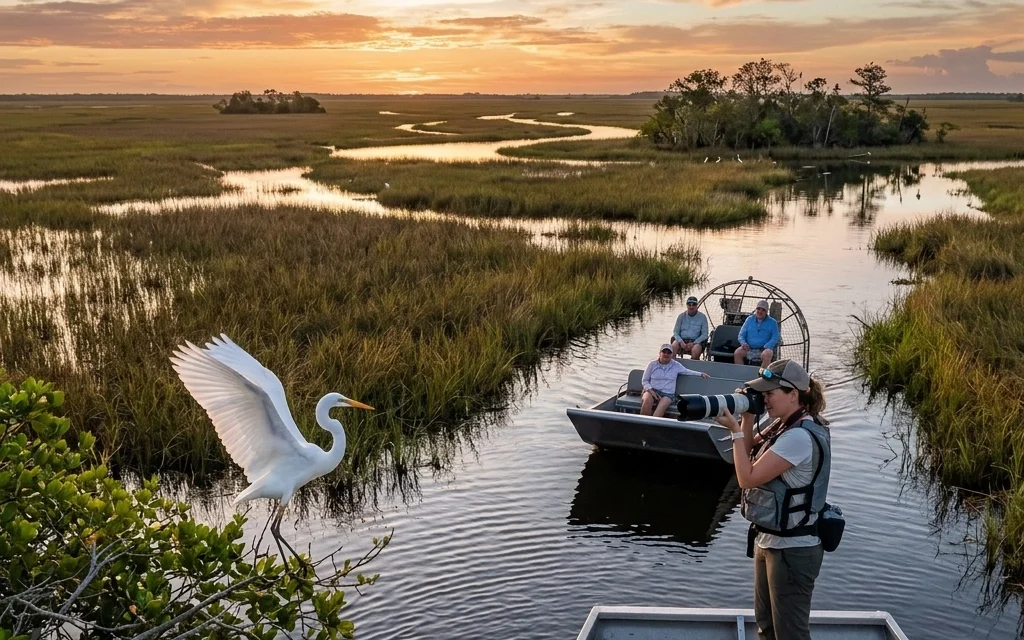
Taking a wildlife tour in the Everglades is a bucket-list experience, but for a beginner, it can feel a bit overwhelming. Between the humidity, the vastness of the park, and the technical challenge of capturing moving animals, it’s easy to feel out of your depth.
But don’t worry: I’ve spent years navigating these waters, and I’m here to tell you that with a little preparation and the right mindset, you can walk away with images that look like they belong in a gallery. This guide will walk you through everything you need to know to master your first Everglades photography tour.
Why the Everglades is a Photographer’s Paradise
The Everglades National Park is a UNESCO World Heritage site for a reason. It is one of the most biodiverse places on the planet. For a photographer, it offers a variety of textures, lighting conditions, and subjects that are hard to find anywhere else. Unlike many other wildlife destinations where you might spend hours searching for a single animal, the Everglades is often teeming with life: if you know where to look.
From the iconic American Alligator to the elusive Roseate Spoonbill, the opportunities are endless. But more than just the animals, the Everglades offers a sense of peace. When you’re out there on a boardwalk or a boat, the world slows down. That’s the feeling we want to capture in our photos.
Timing Your Visit: The Secret to Success
If you show up in the middle of a July afternoon, you’re going to be hot, sweaty, and probably disappointed by the lack of wildlife. In the Everglades, timing is everything.
The Dry Season vs. The Wet Season
The absolute best time to visit for wildlife photography is the dry season, which typically runs from late November through April. As the water levels drop across the state, the fish and wildlife concentrate into the remaining deep-water holes. This makes the animals much easier to find and much more predictable.
The Golden Hours
Just like any other form of outdoor photography, the "Golden Hour" (the hour after sunrise and the hour before sunset) is your best friend. During these times, the light is soft, warm, and directional. It creates beautiful rim lighting on bird feathers and glints off the scales of an alligator. Plus, birds are most active in the early morning as they start their hunt for breakfast.

Essential Gear for Wildlife Tours
You don’t need the most expensive kit in the world to get great shots, but you do need the right kit. If you're looking for a deep dive into what I carry, check out my guide on essential photography gear.
1. The Long Lens (200-600mm)
If there is one piece of gear that is non-negotiable for wildlife, it’s a telephoto lens. A 200-600mm zoom is the "Goldilocks" lens for the Everglades. It’s long enough to get close-up portraits of birds without disturbing them, but versatile enough to zoom out if an alligator swims right past your boat.
2. A Mid-Range Zoom (24-70mm)
Don’t get so focused on the animals that you forget the landscape. The Everglades sunrises are legendary. Having a wider lens allows you to capture the "River of Grass" in all its glory. If you are looking to upgrade your setup, you might even consider the Module 8 lens adapter for some unique cinematic flares.
3. Stability is Key
While a tripod is great for stationary shots, it can be bulky on a crowded boardwalk or a small airboat. I often recommend a monopod. It gives you the stability you need for heavy lenses while allowing you to move quickly when a bird takes flight.
Mastering Your Camera Settings
Wildlife photography is all about speed. Nature doesn’t wait for you to faff around with your dials. Here is a baseline setting to get you started:
- Shutter Speed: Aim for at least 1/1000s. If you are shooting birds in flight, you might even want to go up to 1/2500s.
- Aperture: Shoot "wide open" (the lowest f-number your lens allows, like f/4 or f/5.6). This creates a shallow depth of field, which makes your subject pop against a blurry background.
- ISO: Don’t be afraid of a little grain! In the early morning, you might need to push your ISO to 800 or 1600 to maintain that fast shutter speed. It’s better to have a sharp, grainy photo than a clean, blurry one.
- Focus Mode: Use Continuous AF (AF-C or AI Servo). This allows your camera to keep tracking the subject as it moves.
For more technical tips and deep dives into camera tech, I always recommend checking out Shut Your Aperture for a great community of gear enthusiasts.

Top Spots for Beginners
If it’s your first time, you want locations that are accessible but high-yield.
- Anhinga Trail: This is the "old reliable" of the Everglades. It’s a paved walk and boardwalk where the animals are very used to humans. You can get incredible shots of Anhingas drying their wings and alligators resting just a few feet away.
- Pahayokee Overlook: Perfect for those wide-angle landscape shots. The raised platform gives you a panoramic view of the sweeping sawgrass prairies.
- Shark Valley: Rent a bike or take the tram. The observation tower offers a 360-degree view, and the canal along the path is usually packed with wildlife.
If you’re planning a larger Florida trip and need a break from the swamp, you might also look into Miami's hidden speakeasies for some evening fun after a long day of shooting.
Pro Tips for Better Wildlife Composition
Anyone can take a "record shot" of an animal. To take a photograph, you need to think about composition.
- Get on Their Level: Whenever possible, try to get your camera down to the eye level of the animal. It creates a much more intimate connection and makes the viewer feel like they are part of the animal's world.
- Watch the Background: A messy background of sticks and leaves can ruin a great shot. Move yourself a few inches to the left or right to find a cleaner "window" for your subject.
- Leave Space for Movement: If a bird is looking to the right, compose the shot so there is more "empty" space on the right side of the frame. This gives the subject room to "breathe" or fly into.

Ethics and Safety
It sounds like a cliché, but "take only pictures, leave only footprints" is the golden rule here.
- Distance: Never feed or harass the wildlife. If an animal changes its behavior because of you, you’re too close.
- Alligator Awareness: They look like logs, but they move like lightning. Always maintain a safe distance, especially during mating season.
- Stay on the Path: In places like the Everglades, the ecosystem is fragile. Stick to the boardwalks and designated trails to protect the habitat.
Take Your Skills to the Next Level
While this guide covers the basics, there is so much more to learn about the nuances of light, behavior, and the secret locations within the park. If you’re serious about coming home with world-class images, I’ve put everything I know into one place.
My Everglades Photography Guide is the ultimate resource for anyone visiting the park. It includes specific GPS coordinates, gear recommendations for every budget, and seasonal strategies that I’ve developed over a decade of shooting in Florida. It’s like having a professional guide in your pocket.

Final Thoughts
Photography is a journey, not a destination. Your first few shots in the Everglades might not be National Geographic quality, and that’s okay! The joy is in the experience: the smell of the salt air, the sound of the wind through the grass, and that rush of adrenaline when a Great Egret takes flight right in front of you.
Keep practicing, stay patient, and keep your eyes open. If you want to see what's possible with a bit of dedication, feel free to browse my personal gallery of fine art photography for some inspiration. You can also find more tutorials and stories over at my main blog.
The Everglades is waiting for you. Grab your camera, book that tour, and let’s see what you can capture.
Looking for more photography adventures or planning your next trip? Check out our photography booking experience to see how we can help you capture your best memories.


