
Sponsored by proshoot.io.
If you’ve ever uploaded a beautiful gallery and then watched it load like it’s stuck in 2012, you already know the problem: high-res photos are heavy. That weight hits your site speed, your client experience, and (sometimes) your SEO, without actually improving how your images look on a phone screen.
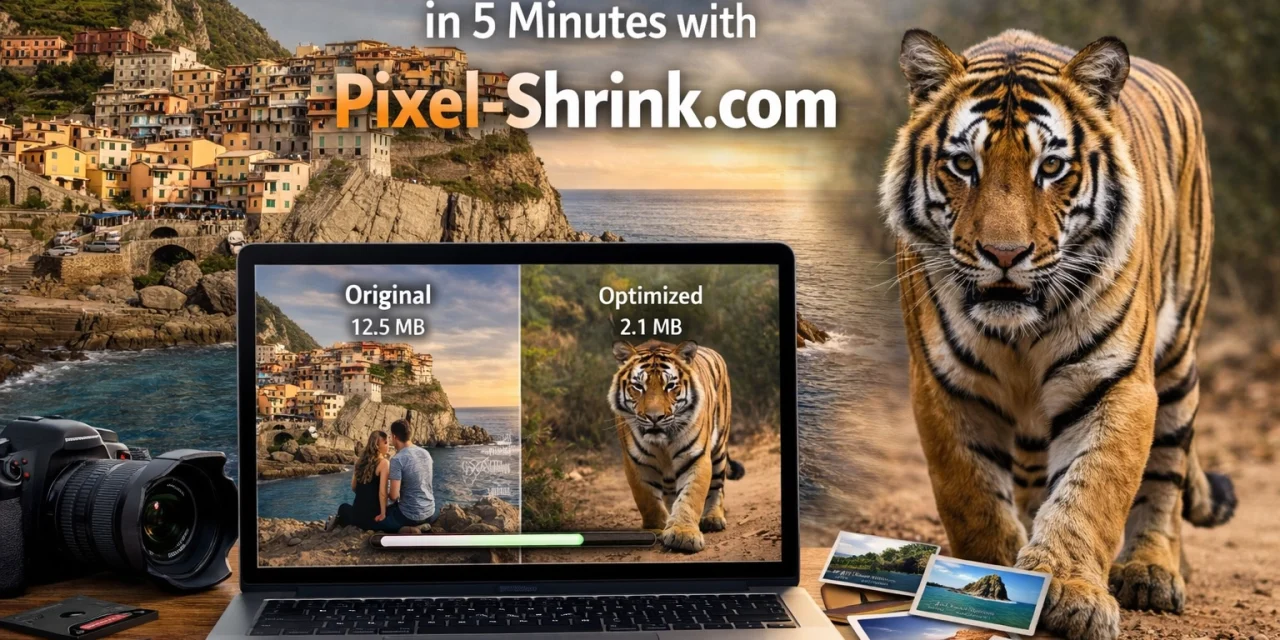
This guide shows you how to optimize high-resolution galleries in about five minutes using Pixel-Shrink.com, with a focus on what photographers care about most: speed without sacrificing image quality.
Why high-res galleries feel “slow” (even on a fast site)
A typical online gallery might include 50–200 images. If each image is 6–18MB (pretty normal for modern cameras), you can accidentally ship hundreds of megabytes to a client’s browser.
That creates a few predictable issues:
- Long initial load times (especially on mobile or slower Wi‑Fi)
- Laggy scrolling as the browser struggles to decode big JPEGs
- Client frustration (which can show up as “the gallery isn’t working” emails)
- Lower conversions if your portfolio pages take too long to display
Here’s the reassuring part: in most cases, you don’t need “full-res” for viewing. You need smartly compressed, appropriately sized, web-friendly files that still look crisp.
What “optimized” actually means for photographers
Image optimization is basically three levers:
- Dimensions (resize): serve the image at a size that matches how it’s displayed (not 6000px wide if it’s shown at 1600px).
- Compression (quality setting): reduce file size while keeping detail and avoiding ugly artifacts.
- Modern formats (WebP/AVIF): when supported, they deliver similar visual quality at smaller sizes than JPEG/PNG.
Pixel-Shrink.com is built around this workflow: keep your photos looking like your photos, just lighter, faster, and easier to deliver online.
The 5-minute workflow: optimize a full gallery with Pixel-Shrink.com
Step 1 (30 seconds): Export with the right intent
Before you compress anything, sanity-check your export settings in Lightroom/Photoshop/Capture One:
- Color space: sRGB (best for web consistency)
- Output sharpening: screen / standard (optional, but helpful)
- Long edge (general guidance):
- Portfolio / blog: 1600–2400px
- Client gallery viewing: 2048–3000px
- If you offer downloads separately, keep those as a different set
This one step prevents you from compressing files that are simply too big to begin with.
If you’re building out a consistent delivery process for clients (contracts, booking, galleries), our guide at Photoguides on the full booking + experience flow is a solid companion: https://photoguides.org/photography-booking-experience
Step 2 (60 seconds): Batch upload your exported images
Head to Pixel-Shrink.com and upload the full set (batch processing is the whole point). Cloud-based tools like this save time because you don’t have to install anything or run heavyweight local exports again.
Best practice: upload one gallery folder at a time so your naming stays organized and you don’t mix sessions.
Step 3 (60–90 seconds): Choose “high quality” compression first
For photographers, the goal isn’t “smallest possible.” It’s best-looking while still dramatically smaller.
Start with a high-quality preset/setting (whatever Pixel-Shrink.com labels as “high,” “best,” or “photography”). Then check a few key files:
- A backlit scene with gradients (sunset skies)
- Skin tones (especially in shade)
- Fine textures (hair, lace, foliage)
- Clean lines (architecture, window frames)
If those look right, the rest of the gallery usually follows.
Step 4 (60 seconds): Spot-check for artifacts the way clients actually view images
Don’t pixel-peep at 400% and panic. Instead, check the optimized images the way they’ll be consumed:
- On mobile (the most common)
- At typical gallery zoom levels
- On a standard laptop display
Look for:
- Blocky transitions in skies (banding)
- “Crunchy” edges around hair
- Over-smoothed skin (waxy look)
- Color shifts (rare with good tools, but worth verifying)
If you need a second reference point for how your images should look when presented well, I share a lot of real-world photography work and display choices here: https://www.edinfineart.com
Step 5 (60 seconds): Download, replace, and keep the originals separate
Download the optimized set and save it into a clearly labeled folder structure, for example:
GalleryName_WEB_OptimizedGalleryName_FULLRES_Archive
This keeps your workflow clean and avoids accidentally delivering compressed files where you meant to deliver full-res.
If you host galleries on your own site, replacing images with optimized versions usually results in an immediate speed improvement. If you use a gallery platform, you can typically re-upload the optimized files as the “viewing” set and keep full-res downloads as an optional add-on.
Recommended settings (quick and practical)
Because every gallery is different, here’s a photographer-friendly baseline you can start from:
For portfolio pages (fast + sharp)
- Long edge: 2000–2400px
- Format: WebP (if available) or high-quality JPEG
- Compression: “High quality” / visually lossless target
For client proof galleries (smooth browsing)
- Long edge: 2048–3000px
- Format: WebP or JPEG
- Compression: prioritize clean skin tones + gradients
For blog posts (speed matters most)
- Long edge: 1600–2000px
- Format: WebP where possible
- Compression: moderate-to-high
If you publish educational photography posts and want more workflow ideas that don’t feel overly technical, browse our educational section: https://photoguides.org/category/educational
What kind of file size reduction should you expect?
While results vary by subject matter (busy foliage compresses differently than studio backdrops), it’s common to see:
- 30–70% smaller files with minimal visible change
- Even better reductions when converting from PNG to WebP (for graphics-heavy images)
Multiply that by 100 photos and you can shave hundreds of megabytes off a single gallery.
That translates directly to:
- faster load
- less client friction
- better browsing on mobile
- fewer “it won’t load” support messages
Quality preservation: the photographer’s checklist
Here’s a quick “don’t compromise your brand” checklist for compressed galleries:
- Skin tones stay natural (no orange shifts, no muddy shadows)
- Eyes stay crisp (no halos from over-sharpening + compression)
- Gradients stay smooth (watch skies and studio backdrops)
- Film grain stays intentional (compression can smear subtle grain if pushed too hard)
- Your editing style stays intact (no weird contrast flattening)
When in doubt, compress a small set first, then apply that same approach to the full gallery.
A simple gallery-optimization routine you can reuse every shoot
If you want this to stay a “5-minute task,” turn it into a repeatable habit:
- Export web-sized images (sRGB, long edge preset).
- Batch compress in Pixel-Shrink.com.
- Spot-check 5 images (skin, sky, foliage, architecture, low light).
- Upload optimized set.
- Archive originals separately.
This is one of those workflows that pays you back every single time, especially during peak season.
If you’re also managing gear decisions (which can affect file size and workflow, hello 45MP bodies), our gear roundup can help you think through what’s worth it: https://photoguides.org/essential-photography-gear
Where Pixel-Shrink.com fits in a real photographer stack
Pixel-Shrink.com isn’t replacing Lightroom or your color workflow. It’s handling the unglamorous last mile: making sure your finished work is delivered in a way that feels premium to the viewer.
In practical terms, it’s especially useful for:
- Wedding galleries (lots of images, lots of mobile viewing)
- Event galleries (fast turnaround + volume)
- Travel galleries (big scenes, big files, lots of sharing)
- Portfolio refreshes (speed improvements without re-editing)
If you shoot events and care about the client experience from inquiry to delivery, you’ll probably also like our Atlanta event photography guide for how people browse and book: https://photoguides.org/atlanta-event-photographer
SEO bonus: faster pages usually perform better (without you “doing SEO”)
While image optimization isn’t a magic SEO button, speed and usability are strongly correlated with better performance: especially on mobile.
When your galleries load quickly:
- visitors view more images
- bounce rates often drop
- your portfolio feels more polished
And if you’re building authority through content, I also publish broader photography thoughts and guides over on https://www.blog.edinchavez.com that pair well with a fast, image-forward site.
Privacy note (because you’re uploading client work)
Any time you upload images to a web tool, it’s smart to understand how data is handled (retention, processing, deletion). If you want to see how we handle privacy on our side at Photoguides, here’s our policy: https://photoguides.org/privacy-policy
Quick recap: the “5-minute” checklist
- Export web-sized images (don’t upload full-res unless you truly need to)
- Batch upload to Pixel-Shrink.com
- Choose a high-quality compression level first
- Spot-check real-world problem areas (skin, skies, fine detail)
- Download and replace gallery files, keep originals archived
Sponsored by proshoot.io.


