
Category: Photo Guides
We’ve all been there. You’ve just finished an incredible shoot, spent hours perfecting the edits in Lightroom, and you’re ready to show the world. But then you try to upload those high-resolution masterpieces to your website or a client gallery, and everything slows to a crawl. Or worse, the platform rejects your file because it’s "too large."
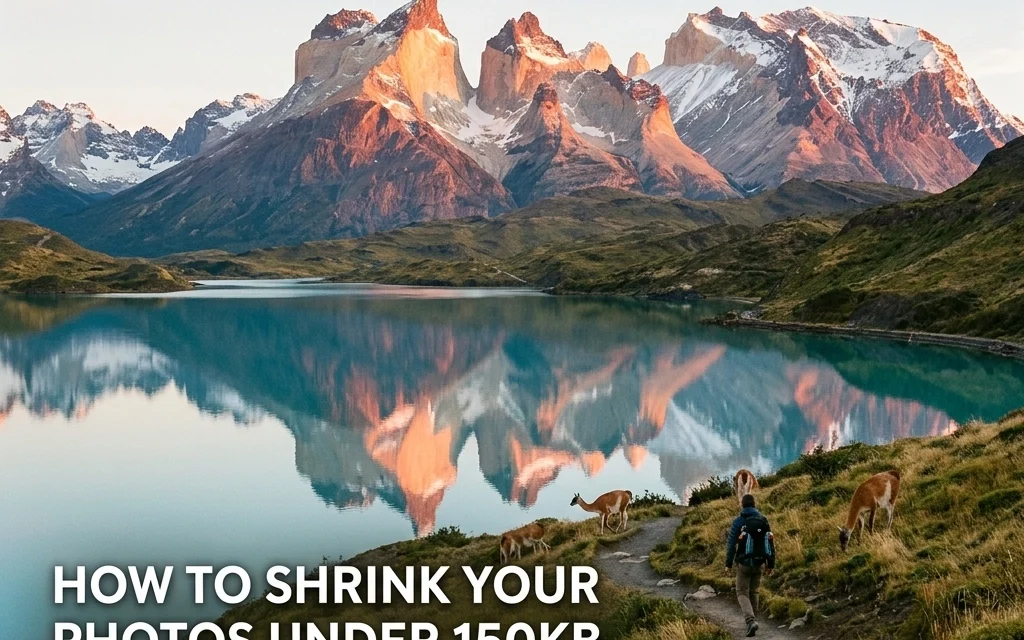
As photographers, we’re often caught in a tug-of-war between image quality and file size. We want the crisp details, the vibrant colors, and the professional finish, but the internet demands speed. If your website takes more than a few seconds to load, visitors are gone before they even see your work. That’s why hitting that "sweet spot": usually under 150kb: is the holy grail of web photography.
In this guide, I’m going to show you exactly how to shrink your photos using Pixel-Shrink.com, a tool designed specifically for photographers who refuse to compromise on quality. This post is part of our series on efficient workflow, and it’s proudly sponsored by proshoot.io, the pros who know exactly what it takes to deliver high-end results in a digital world.
The 150kb Challenge: Why It Matters
You might be wondering, "Why 150kb? My phone takes 10MB photos!" While 10MB is great for printing a poster, it’s a nightmare for web performance. Large files lead to slow page load times, which hurts your SEO and frustrates your potential clients.
When you manage to get a stunning image under 150kb, you’re giving your website the best of both worlds: lightning-fast speed and professional visual appeal. Whether you’re showcasing your latest work on Edin Chavez’s blog or setting up a professional portfolio at Edin Fine Art, speed is a non-negotiable part of the user experience.
 1")
Step 1: Pre-Upload Preparation
Before you even head over to Pixel-Shrink.com, you need to do a little bit of legwork in your editing software. Think of this as "pre-optimizing."
One of the biggest mistakes photographers make is trying to compress a massive file without resizing it first. If your photo is 6000 pixels wide but only being displayed in a 1200-pixel container on your site, you’re carrying a lot of dead weight.
- Resize for the Destination: If the image is for a blog post, 1500px to 2500px on the long edge is usually more than enough.
- Export Settings: When exporting from Lightroom or Capture One, set your quality to around 90-100%. Don't worry about the file size just yet; Pixel-Shrink will handle the heavy lifting.
- Check Your Gear: Sometimes the way we shoot affects how files compress. If you're looking for the best tools to capture that initial data, check out our essential photography gear guide.
Step 2: The Magic of Pixel-Shrink.com
Now that you have your resized image, it’s time to use Pixel-Shrink.com. What makes this tool different from generic online compressors is its focus on maintaining the integrity of photographic data. It’s built to understand textures, gradients, and fine details: the things we actually care about.
The process is incredibly simple:
- Open the site.
- Drag and drop your images into the browser.
- Watch it work its magic.
The platform can often reduce file sizes by up to 80% without any noticeable loss in quality. This is a game-changer for those of us who want our educational content to look as good as our fine art prints.
 2")
Step 3: Choosing the Right Compression Level
Not all images are created equal. A landscape with a soft, blue sky handles compression differently than a detailed wedding dress or a grit-filled street scene.
- The "Balanced" Setting: This is your best friend. For 90% of your web needs, this setting provides the optimal middle ground. It aggressively targets unnecessary metadata and redundant pixel data while keeping the visual fidelity high.
- The "High Quality" Setting: Use this if you’re planning to upload the image to a platform that uses its own aggressive compression later (like Instagram or Facebook). By starting with a "High Quality" compressed file, you ensure that the social media algorithms have the best possible base to work from.
If you’re a pro looking to streamline your entire client delivery process, don't forget to look into how proshoot.io can help manage your workflow alongside these optimization tools.
Step 4: Quality Control (Trust but Verify)
Never just download and disappear. Once Pixel-Shrink has finished its task, use the preview tool. Zoom in on areas with high detail: like eyes in a portrait or the leaves on a tree.
You’re looking for "artifacts": those blocky, digital patterns that appear when compression goes too far. If you see them, you might need to go back a step, increase your original export size slightly, and try again. However, in most cases, you’ll find that even at 150kb, the images stay remarkably clean.
For more tips on maintaining professional standards, I always recommend reading through camera reviews and techniques to ensure your source files are as clean as possible.
 3")
Step 5: Download and Deploy
Once you’re happy with the preview, download the files. You’ll likely notice that your 2MB or 3MB photo is now sitting comfortably at 120kb or 140kb.
Now, you can upload it to your site with confidence. Whether you’re building an Atlanta event photography portfolio or sharing wedding photography insights, your pages will load instantly, keeping your audience engaged and your bounce rate low.
Pro Tip: Managing Bulk Uploads
If you’re working on a large project: say, a gallery of 100 images from a weekend getaway: don't do them one by one. Pixel-Shrink allows for batch processing, which is a massive time-saver.
Imagine you’ve just come back from exploring cheap weekend getaways or visiting Miami’s hidden speakeasies. You have hundreds of photos to share. Being able to drag them all into one window and have them optimized for the web in seconds is what separates the hobbyists from the pros.
 4")
Why Photographers Trust Pixel-Shrink
In the photography world, reputation is everything. We spend thousands on lenses and cameras to get the sharpest images possible. It feels counter-intuitive to then "shrink" those images. But the reality is that the digital landscape is the primary way people consume our art.
Using a tool like Pixel-Shrink.com, especially with the backing of industry experts like proshoot.io, ensures that you aren't just making files smaller: you're making them smarter. You're removing what the eye can't see to make room for what the viewer needs to experience: your vision.
For more technical deep dives and gear talk, I always suggest heading over to Shut Your Aperture. It’s a great community for keeping your skills sharp while you're managing the business side of things.
Final Thoughts
Achieving a file size under 150kb doesn't have to mean sacrificing your artistic integrity. By resizing correctly, choosing the right compression settings on Pixel-Shrink.com, and always performing a quality check, you can ensure your work looks stunning on any screen.
Fast websites lead to happy clients, better SEO, and more bookings. It’s a simple step in your workflow that pays massive dividends. So, before your next upload, give your photos the "shrink" treatment and see the difference it makes.
If you're looking for more ways to improve your photography business, from booking experiences to finding the best lens adapters, we’ve got you covered here at Photoguides. Keep shooting, keep optimizing, and keep sharing your story with the world.


