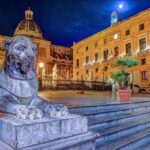
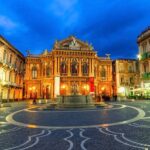
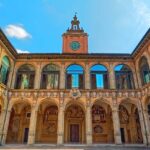
Enjoy capturing breathtaking cityscapes by exploring the best photography spots that showcase stunning architecture and vibrant landscapes. This guide helps you discover important locations, offers tips on timing for optimal light, and highlights safety precautions to ensure your experience is enjoyable. From rooftops to waterfronts, each site presents unique perspectives that can elevate your photography skills. Prepare your gear and immerse yourself in the rich scenes waiting to be captured around every corner.
Key Takeaways:
- Research best times for lighting to capture cityscapes effectively.
- Scout locations in advance for optimal angles and compositions.
- Utilize foreground elements to add depth to your shots.
- Consider varied perspectives, such as rooftops or bridges, for unique views.
- Be mindful of weather conditions that enhance or detract from photos.
- Incorporate local culture and activities to enrich your images.
- Experiment with different lenses for diverse photographic styles.
![]()
Scouting the Skyline: Essential Pre-Trip Research
Pre-trip research lays the groundwork for stunning cityscape photography. By identifying key locations and optimal times to capture them, you enhance the odds of creating breathtaking images. Search for resources that information about weather patterns, best viewpoints, and local photography guides, which streamline your journey and offer insight into hidden gems.
Identifying Iconic Landmarks
Your photography portfolio will greatly benefit from featuring iconic landmarks that define the city’s character. Prioritize major attractions like skyscrapers, bridges, and historical sites, ensuring you include well-known structures that give your images context and resonate with viewers. Check maps and guides to pinpoint these landmarks and plan your approach accordingly.
Using Local Knowledge: Social Media and Forums
Social media and photography forums provide invaluable insights into the best spots for cityscape photography. Engage with local photographers and enthusiasts, as they often share hidden locations and tips that enhance your experience. Platforms like Instagram and Reddit can unveil new perspectives and on-the-ground advice tailored to specific cities.
Dive into targeted hashtags on Instagram or photography groups on Facebook, where you can discover popular and lesser-known locations from local photographers. Platforms like Flickr and 500px allow you to filter images by location, offering visual inspiration and practical tips about shooting angles and optimal times to visit. Engaging in these communities not only bolsters your research but can lead to networking opportunities and even meet-ups, forging connections with individuals who share your passion for capturing cityscapes.
![]()
Timing is Everything: The Golden Hours of Photography
The magic of cityscape photography lies within the golden hours, which are the periods shortly after sunrise and just before sunset. During these times, the light transforms the scene, providing a warm glow that enhances colors and creates dramatic shadows. Planning your shoots around these hours not only ensures stunning images but also fosters a tranquil atmosphere, lessening the hustle of daytime crowds.
Mastering Light: Sunrise vs. Sunset
Sunrise often delivers softer light that can make buildings look ethereal, while sunset tends to intensify hues, with vibrant oranges and pinks painting the sky. Each moment provides unique opportunities; sunrise scenes can reveal an awakening city, whereas sunsets offer a dramatic backdrop for illuminated silhouettes, allowing your creativity to thrive.
Weather Considerations for Stunning Shots
Weather significantly influences your cityscape photography. Overcast skies can create a soft, diffused light ideal for capturing detailed architectural features, while rain can produce striking reflections on wet surfaces. Conversely, clear skies invite intense colors at sunrise and sunset, yet may lack dramatic cloud formations. Always check the forecast to align your shooting plans with the desired atmospheric conditions.
In addition to checking the forecast, consider how different weather elements can add depth to your photos. For instance, fog can lend a mysterious quality, softening edges and creating a layered effect in your images, while a stormy sky can add drama and texture. Even snow can offer unique opportunities to photograph a city’s architecture against a stark, white backdrop. Always be prepared to adapt your plans to take advantage of these dynamic conditions for more compelling shots.
Gear Up: Choosing the Right Equipment
Your gear can significantly impact the quality of your cityscape photographs. Selecting the right equipment helps you capture stunning landscapes and intricate details. Consider portability, versatility, and the conditions you’ll encounter. A well-rounded kit tailored to your shooting style will ensure you’re prepared for any opportunity that arises.
Cameras and Lenses: What to Bring
For cityscape photography, a DSLR or mirrorless camera with interchangeable lenses is ideal. A wide-angle lens (16-35mm) captures expansive views, while a telephoto lens (70-200mm) helps isolate specific features or details from a distance. Bringing a fast prime lens (35mm or 50mm) allows for low-light performance during the golden hours.
Accessories for Optimal Results
A tripod is vital for long exposure shots and stability, especially in low light. A remote shutter release minimizes camera shake during captures. Additional items like polarizing filters reduce glare and enhance colors, while extra batteries and memory cards ensure you won’t miss any moments.
Investing in quality accessories can elevate your photography significantly. A sturdy tripod keeps your shots steady, crucial for long exposure or detailed framing. Using a circular polarizer not only deepens the sky’s color but also reduces reflections from glass buildings, revealing their architectural beauty. For enhanced versatility, consider a variable neutral density filter, allowing you to control light exposure effectively, especially during bright daylight. Keeping spare batteries and memory cards on hand eliminates any risk of running out mid-shoot, ensuring you can capture every breathtaking view the city has to offer.
![]()
Composition Secrets: Framing the Perfect Shot
Mastering composition is vital for elevating your cityscape photography. Techniques such as utilizing leading lines, symmetry, and exploring different perspectives will dramatically enhance your ability to convey the beauty of urban landscapes. These methods guide the viewer’s eye, create balance, and capture attention. By integrating various composition strategies, you can develop a signature style that resonates with your audience.
Utilizing Leading Lines and Symmetry
Leading lines naturally draw the viewer into your image, creating depth and perspective. Streets, bridges, and architectural features serve as strong lines that guide the eye towards the focal point. Symmetry, on the other hand, brings harmony to your shot. Look for structures like buildings or reflections that embody balance, making your images more impactful and pleasing to the eye.
Experimenting with Angles and Perspectives
Varying your angles and perspectives transforms ordinary shots into extraordinary ones. By shooting from unique vantage points, such as rooftops or low angles, you discover new dimensions in your compositions. Don’t hesitate to change your stance, crouching or climbing to capture the skyline from an unconventional viewpoint that emphasizes scale or contrasts within your frame.
Engaging with different angles, such as eye-level or bird’s-eye views, infuses dynamism into your shots. For instance, shooting a bustling street from above can encapsulate the energy of the city, while a ground-level perspective may highlight architectural intricacies. Explore urban settings at varying heights and distances; sometimes, a few feet can drastically alter the mood and storytelling of your photograph, making the difference between a flat image and a breathtaking one.
Blending In: Finding the Best Viewing Locations
To capture stunning cityscapes, you must identify the ideal viewing locations that offer unique perspectives. Exploring various vantage points can provide a fresh take on familiar landmarks. Prioritize high ground for expansive views, and consider seasonal lighting for dynamic and captivating shots. Research local parks, bridges, and public buildings that are often overlooked yet offer breathtaking scenery. Your ability to blend in and shoot unobtrusively will often lead to authentic, captivating photos that convey the true essence of the city.
Rooftop Bars and Scenic Overlooks
Rooftop bars and scenic overlooks serve as fantastic locations for cityscape photography, combining a vibrant atmosphere with panoramic views. Enjoying a cocktail while witnessing the sun setting over the skyline creates a dramatic backdrop. Establishments like the 230 Fifth Rooftop in New York City or the Sky Bar in Bangkok are renowned for their spectacular vistas. Visiting these spots just before dusk allows you to capture the city alive with glimmering lights, offering a perfect blend of ambiance and aesthetic allure.
Hidden Gems and Off-The-Beaten-Path Spots
Exploring off-the-beaten-path locations can lead you to some of the most stunning photography opportunities. Look for lesser-known architectural marvels, intimate alleyways, and secluded parks that tell a story about the city’s unique character. These hidden gems not only provide richness in composition but often have fewer crowds, allowing for more control over your shot. Seek recommendations from local photographers or online photography forums to discover places that aren’t widely publicized.
One overlooked area to explore is the High Line in New York City, where an abandoned railway has been transformed into a lush park offering urban views. Similarly, in Lisbon, the Alfama district features narrow streets and rustic buildings perfect for atmospheric shots. Using local insights can guide you to places like the Shard’s viewing platform in London during off-peak hours, where you can capture the expansive skyline without interruptions. These spots not only showcase the city from a different angle but often embody its hidden stories, enriching your photography collection.
Conclusion
Ultimately, by exploring the iconic cityscape photography spots outlined in this guide, you can elevate your photography skills and capture stunning images that reflect the essence of urban life. You should consider the best times to visit, utilize different angles, and embrace the local culture to enhance your experience. With patience and creativity, you’ll create memorable photographs that tell a story and showcase the unique charm of each city you visit.
FAQ
Q: What are the best times of day for cityscape photography?
A: Early morning and late afternoon provide the best natural lighting, often termed the golden hour, which enhances colors and shadows.
Q: How can I find iconic viewpoints for cityscape shots?
A: Research local landmarks, visit observation decks, and use online maps or photography guides to discover popular viewpoints.
Q: What equipment is crucial for capturing stunning cityscapes?
A: A DSLR or mirrorless camera, a tripod for stability, and a wide-angle lens to capture expansive views are recommended.
Q: How do I compose my cityscape shots effectively?
A: Use the rule of thirds for balance, incorporate leading lines to draw the eye, and frame the subject with surrounding elements.
Q: Can I capture cityscapes at night?
A: Yes, night photography can create dramatic images. Use a tripod, longer exposure times, and adjust your camera settings for low light.
Q: What techniques can improve my cityscape photography?
A: Experiment with different angles, adjust your camera settings for light conditions, and utilize filters to enhance contrast and color.
Q: Is post-processing necessary for cityscape shots?
A: While not mandatory, post-processing can enhance your images by adjusting lighting, sharpness, and colors for a more polished look.


