
![[HERO] A professional photographer editing a landscape photo in Luminar Neo, showing a dramatic sunset sky being applied to a coastal scene with realistic reflections on the water.](https://cdn.marblism.com/dNd7QA8sE0i.webp "Luminar Neo 101: A Beginner’s Guide to Mastering Sky AI for Epic Sunsets 1")
Category: Photo Guides
We’ve all been there. You plan the perfect trip, maybe a cheap weekend getaway to the coast or a long-awaited hike in a National Park. You wake up early, scout the location, and set up your tripod. But then, the sky stays a flat, uninspiring shade of gray. It’s frustrating, right? You have the perfect composition, but the "soul" of the photo, the light and the sky, just isn't showing up for the party.
In the past, fixing a boring sky meant hours of tedious masking in Photoshop. It was a chore that took the joy out of the creative process. But things have changed. As part of our series on why Luminar Neo is the premier editing software for modern photographers, today I want to walk you through the absolute magic of Sky AI.
Whether you’re a pro looking to speed up your workflow or a beginner who just wants their vacation photos to look like the ones on my Fine Art website, Sky AI is your new best friend. Let’s dive into how you can master this tool to create epic sunsets that look completely natural.
Why Sky AI is a Game-Changer
Most sky replacement tools simply "cut and paste" a new sky over the old one. This usually looks terrible because the lighting on the ground doesn't match the new sky. If you put a fiery orange sunset into a photo taken on a blue, overcast day, the shadows will look "cool" while the sky looks "warm." It’s an instant giveaway that the photo was faked.
What makes Luminar Neo the best-in-class choice is how the AI thinks. It doesn't just swap the sky; it analyzes the entire scene. It looks at the colors, the depth, and the reflections, and then it relights the entire landscape to match your new sunset. It’s the difference between a cheap filter and professional-grade artistry.
If you haven’t grabbed your copy yet, you can download the software here and follow along. Trust me, once you see how easy this is, you’ll never look at a cloudy day the same way again.

Alt text: A split-screen comparison showing a "Before" image with a flat gray sky over a mountain lake and an "After" image where Luminar Neo Sky AI has replaced it with a vibrant purple and orange sunset, including realistic color shifts in the water and mountains.
Step 1: Choosing the Right Sunset
The secret to a believable sky replacement starts with selection. When you open the Sky AI tool in the Creative tab, you’ll see a dropdown menu with various categories. For that "wow" factor, you’ll want to head straight for the Sunsets or Dramatic Sunsets folders.
When picking a sky, pay attention to the direction of light. If your original photo has shadows falling to the left, try to pick a sky where the sun is positioned in a way that makes sense. Luminar Neo is smart, but helping it out with a logical choice makes the end result much more convincing.
If you find yourself running through the built-in options quickly, you can always expand your library with professional sky overlays to keep your portfolio looking unique.
Step 2: The Magic of Relighting
This is where the real "Neo" magic happens. Under the Sky AI settings, you’ll find the Relight Scene sliders.
- Relight Amount: This determines how much of the new sky’s color is "spilled" onto your foreground. If you’ve chosen a deep red sunset, cranking this up will cast a warm glow over your trees, rocks, and buildings.
- Relight Saturation: This controls the intensity of that color spill.
- Relight Human: This is a lifesaver if you have people in your shot (maybe from a wedding photography session). It ensures that your subjects are relit naturally without looking like they’ve been dipped in orange paint.

Alt text: A close-up of the Luminar Neo interface highlighting the Sky AI tool options, specifically the Relight Scene sliders and the Sky Selection dropdown menu.
Step 3: Nailing the Horizon and Reflections
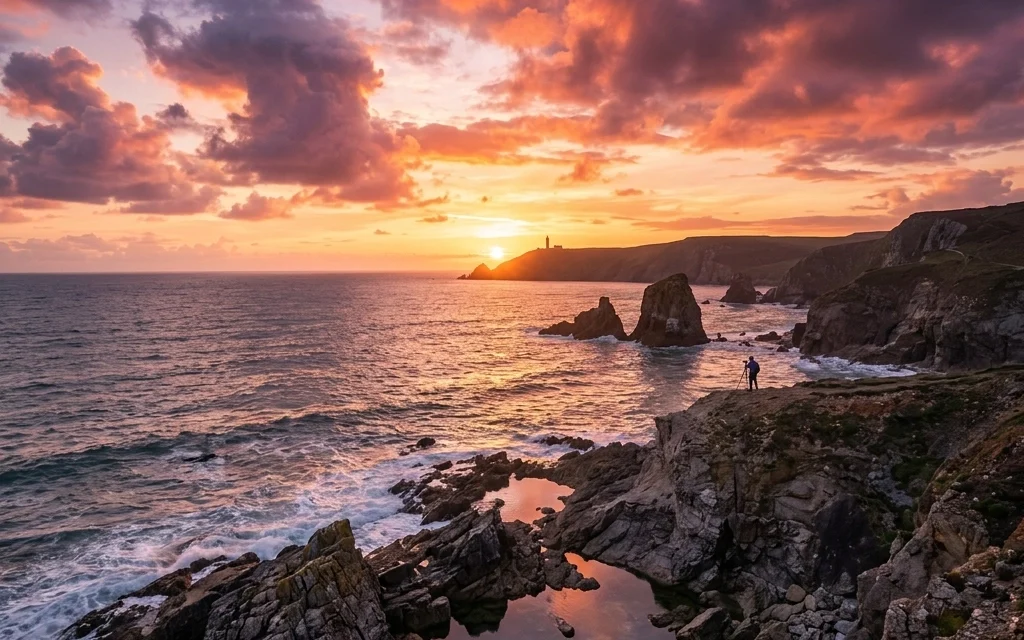
Nothing ruins a sky replacement faster than a blurry or misaligned horizon line. If you’re shooting a landscape with a clear horizon: like the ocean in the Dominican Republic: you need that transition to be pixel-perfect.
Luminar Neo handles the masking automatically, even around complex edges like tree branches or hair. However, if things look a bit "off," use the Horizon Position and Vertical Offset sliders to line things up perfectly.
Pro Tip: If your photo features water, check the Reflection Amount slider. One of the reasons I love using this for my own work on my photography blog is that the AI actually creates a reflected version of the new sky in the water, accounting for ripples and waves. It’s incredibly realistic.
Step 4: Finishing Touches for Realism
To make your sunset truly epic, you might need to adjust a few more fine details:
- Sky Defocus: If your foreground is sharp but you’re using a wide aperture, the sky should be slightly out of focus. Use this slider to match the depth of field of your camera lens.
- Atmospheric Haze: Sunsets often have a bit of moisture or dust in the air. Adding a touch of haze can help "seat" the sky into the environment.
- Sky Temperature: Sometimes the sky is too blue or too orange. Use this to fine-tune the mood.

Alt text: A stunning landscape photo of a desert canyon at sunset edited in Luminar Neo, showing perfectly matched warm lighting on the canyon walls and a soft, hazy horizon line.
When to Use Sky AI (and When Not To)
While Sky AI is powerful, it’s a tool, not a crutch. I always recommend trying to capture the best light possible in-camera. Reading up on essential photography gear and checking camera reviews can help you get better raw files to work with.
However, we can’t control the weather. If you’ve traveled halfway across the world to photograph a specific landmark and the weather doesn't cooperate, Sky AI allows you to fulfill the vision you had in your head. It’s about storytelling. You’re not "faking" a photo; you’re creating the image that represents how the moment felt.
For more tips on gear and techniques to improve your base photos, I always suggest checking out the community at Shut Your Aperture. They have great insights on how to get the most out of your sensor before you even hit the editing suite.
Integrating Sky AI into Your Workflow
Sky AI shouldn't be the only tool you use. Usually, after I replace a sky, I’ll jump into Relight AI or Enhance AI to balance the overall exposure. If there are distracting elements: like a stray tourist or a power line: I’ll use GenErase to clean up the scene before the final export.
The beauty of Luminar Neo is that it’s non-destructive. You can go back and swap the sky as many times as you want until it feels just right. It’s a playground for your creativity.

Alt text: A wide-angle shot of a city skyline during the "blue hour," with a dramatic sunset sky added via Luminar Neo, showing lights from the buildings beginning to glow and reflecting in a nearby river.
Final Thoughts
Mastering Sky AI is about more than just clicking a button. It’s about understanding light, color, and composition. By paying attention to the relighting settings and the horizon placement, you can create images that leave people wondering, "How did they get that shot?"
Luminar Neo continues to prove itself as the most intuitive, powerful software for photographers who want professional results without the steep learning curve of traditional editors. If you want to take your landscapes to the next level, I highly recommend giving it a shot. You can find more educational resources and reviews on our site to help you on your journey.
Ready to transform your photos? Head over to Skylum and grab Luminar Neo today. Your portfolio will thank you.


