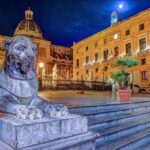
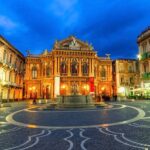
You can transform your travel photos into stunning visuals that stand out by following a few simple tips. Use natural light to enhance the vibrancy of your images, and pay attention to your composition for a balanced look. Incorporate different angles and perspectives to add interest, and consider your settings to capture the essence of your surroundings. Lastly, don’t underestimate the power of post-processing to refine your photos, giving them that polished, professional touch you desire.

Key Takeaways:
- Use natural lighting to enhance the quality and mood of your photos.
- Consider the rule of thirds for better composition and visual interest.
- Incorporate leading lines to draw attention and guide the viewer’s eye.
- Experiment with different perspectives and angles for unique shots.
- Edit photos to improve brightness, contrast, and color balance.
- Invest in a good camera or smartphone with advanced photography features.
- Practice regularly to refine your skills and develop your style.

Unlocking the Power of Composition
Effective composition can elevate your travel photography, allowing your images to resonate more with viewers. By considering various techniques, you can lead the eye and create balance within the frame. Understanding composition enables you to capture the essence of a moment, highlighting significant details while maintaining a compelling narrative.
The Rule of Thirds: Framing Your Subject
Applying the rule of thirds involves dividing your frame into a 3×3 grid and positioning key elements along these lines or their intersections. This technique creates a harmonious balance, making your subject more engaging and dynamic. By avoiding centering your subject, you introduce a sense of movement and draw the viewer’s attention to the surrounding context.
Leading Lines: Guiding the Viewer’s Eye
Utilizing leading lines transforms your photos by gently steering the viewer’s gaze towards important elements within the frame. These lines can be anything from roads, rivers, or architectural features, creating a pathway for the eye to follow. Incorporating leading lines adds depth and dimension, enhancing the overall storytelling in your travel images.
Leading lines serve not only as visual guides but also evoke emotions and establish connections between various elements in your photo. For instance, a winding trail can symbolize a journey, while converging shapes may imply unity. Use these lines creatively to create a stronger narrative and draw attention to your subject. Experiment with different angles to find how these lines can enhance your story and engage your audience effectively.
Harnessing Light for Dramatic Effect
Light serves as the backbone of photography; its manipulation can yield stunning results. The angle, intensity, and quality all influence the mood and impact of your images. Exploring various lighting scenarios helps you enhance depth, texture, and color, transforming ordinary scenes into captivating memories. Understanding how to harness available light, whether soft or harsh, will elevate your photography game, making each shot more dynamic and engaging.
Golden Hour: Timing Your Shots for Maximum Impact
Shooting during the golden hour, shortly after sunrise or before sunset, bathes your subjects in warm, diffused light, which can enhance colors and soften shadows. This magical timeframe, lasting about an hour, creates a natural glow that is often sought by professional photographers. Aim to be ready with your camera, as this fleeting moment can yield breathtaking visuals that feel almost ethereal.
Natural Light vs. Flash: When to Use Each
Choosing between natural light and flash can dramatically alter your images. Use natural light for its qualities of warmth and softness, particularly in outdoor settings or during golden hour. Flash is beneficial in low-light situations or when you want to fill in shadows, but it can create harshness if not used correctly. Balancing both techniques allows you to adapt to varying conditions while achieving the best results.
Natural light fosters a more authentic feel, especially during daytime when ambient light adds vibrancy to your scenes. Explore shadows and highlights for texture, utilizing various angles to capture the interplay of light across your subject. Flash, while effective, requires careful application to avoid overexposure and unnatural results. Use diffusers or bounce techniques to soften the impact when needing to illuminate your subjects indoors or during low-light conditions. Each option has its strengths; knowing when to switch from one to the other is what shapes your unique photographic style.
Elevating Your Post-Processing Skills
Post-processing is where your travel photos can truly shine. With a few adjustments, you can enhance color, contrast, and sharpness, bringing your images to life. Learning how to effectively edit your photos can make the difference between an average snapshot and a professional-looking image. Explore various techniques and software tools to transform your visuals, giving them that polished finish that captures attention and evokes emotion.
Essential Editing Tools for Stunning Visuals
To achieve breathtaking edits, you’ll need reliable software. Programs like Adobe Lightroom and Photoshop are industry standards, offering powerful features such as advanced color correction, detail enhancement, and creative filters. For a free option, consider GIMP or online platforms like Canva which provide intuitive interfaces and crucial editing capabilities. Familiarizing yourself with these tools allows you to significantly elevate your imagery.
Common Editing Mistakes to Avoid
Avoid over-editing, which can easily ruin your travel photos. Many photographers fall into the trap of excessive saturation and contrast, leading to unrealistic images. Instead, focus on maintaining the natural look of your subject while enhancing important aspects. Other pitfalls include neglecting to crop effectively or overlooking horizon lines, which can distract from the composition and overall impact of your photography.
Over-editing is often driven by the desire to make photographs pop, yet it can lead to unnatural colors and loss of detail. Aim for subtlety, ensuring that enhancements complement your image rather than overpower it. Skipping proper cropping can result in distracting elements on the edges, while crooked horizons can create an unprofessional appearance. Strive for balance, making sure every edit serves to enhance your storytelling without detracting from the authenticity of your travel experience.

Mastering Color Theory in Travel Photography
Understanding color theory can drastically enhance the impact of your travel photos. By mastering color relationships and their emotional connotations, you can create images that not only capture attention but also convey specific moods. Use color effectively to guide the viewer’s eye and evoke feelings that align with your travel narrative.
The Impact of Color Harmony on Mood
Color harmony plays a pivotal role in setting the mood of your images. For instance, warm tones like reds and oranges radiate energy and excitement, while cool shades such as blues and greens can evoke calmness and serenity. By thoughtfully selecting harmonious colors, you can elicit emotional responses that resonate with your audience and enrich the story behind each photograph.
Complementary Colors: Enhancing Your Compositions
Complementary colors, those directly opposite on the color wheel, can significantly enhance your compositions. By incorporating these colors, you create striking contrasts that draw the viewer’s eye. For instance, pairing vibrant oranges with deep blues not only makes elements pop but also adds depth and interest to your images.
Utilizing complementary colors is a powerful technique to elevate your photography. For example, if you capture a sunset with rich oranges, framing it against a silhouette of deep blue mountains will create a compelling visual tension. Consider how these contrasting hues interact in your scene; they can highlight your subject and lead to well-balanced compositions. Experiment with various combinations to discover what resonates most with your style and enhances the narrative of your travels.
Capturing Culture: Telling a Story Through Your Lens
Every photo you take has the potential to narrate a rich tale of the culture surrounding you. Use your camera to express not just what you see, but also the emotions and stories behind the scenes. Consider the customs, traditions, and daily lives of the people in your destination, and strive to encapsulate those nuances through thoughtful composition and timing.
The Importance of Context in Photo Composition
Context enriches your images, providing viewers with a deeper understanding of the location and its inhabitants. Be mindful of elements such as architecture, landscapes, and everyday activities that contribute to the cultural narrative. Aim for wide shots that place subjects within their environment, enhancing the story you wish to convey and allowing the viewer to connect on a more intimate level.
Building Rapport: Candid Shots of Locals
Candid shots capture authentic moments that reveal the essence of a culture. Establishing rapport with locals can lead to more genuine expressions and interactions, making your photographs resonate with life and energy. These images often tell more compelling stories than posed portraits, showcasing the unique character of the people you meet.
Approach locals with respect and curiosity, engaging in brief conversations to break the ice. Sharing a smile or a compliment can open doors to spontaneous moments that are photographically rich. For example, if you capture a fisherman mending his nets or children laughing during a game, these fleeting instances embody the spirit of the community. Aim to photograph locals in their natural activities, as these candid shots often reveal the vibrancy and humanity behind the culture, creating a connection that transcends borders and language.
Conclusion
Drawing together your travel photo skills with these easy tips will significantly enhance the quality of your images. By paying attention to composition, lighting, and editing, you can create stunning visuals that capture the essence of your adventures. Use your unique perspective to tell stories through your photos, making them stand out. With practice and attention to detail, you can achieve a professional look that elevates your travel memories, allowing you to share them confidently with others.
FAQ
Q: What equipment do I need for professional-looking travel photos?
A: While a DSLR or mirrorless camera is ideal, a high-quality smartphone can also produce great results. Consider using a tripod for stability and a lens with a wider aperture for better depth of field.
Q: How can I improve my composition in travel photography?
A: Use the rule of thirds by dividing your frame into a 3×3 grid and position key elements along these lines or at their intersections. Experiment with leading lines and framing to guide the viewer’s eye.
Q: What is the best time of day to take travel photos?
A: The golden hour, which occurs shortly after sunrise and before sunset, provides soft, warm lighting that enhances colors and reduces harsh shadows.
Q: How can I edit my travel photos to enhance their quality?
A: Use editing software like Adobe Lightroom or mobile apps such as Snapseed to adjust brightness, contrast, saturation, and sharpness. Cropping can also help improve composition.
Q: What should I focus on to capture the essence of a location?
A: Capture both iconic landmarks and candid moments. Including local people, food, and cultural elements adds authenticity and tells a richer story about the destination.
Q: How can I manage lighting when photographing in harsh sunlight?
A: Seek shade for softer light or shoot during the golden hour. Utilize reflectors or diffusers to soften harsh sunlight and reduce shadows on subjects.
Q: Is it beneficial to use filters in travel photography?
A: Yes, polarizing filters reduce glare and enhance colors, especially in landscapes. ND filters allow for longer exposures in bright conditions, creating smooth water effects.


