
Category: Photo Guides
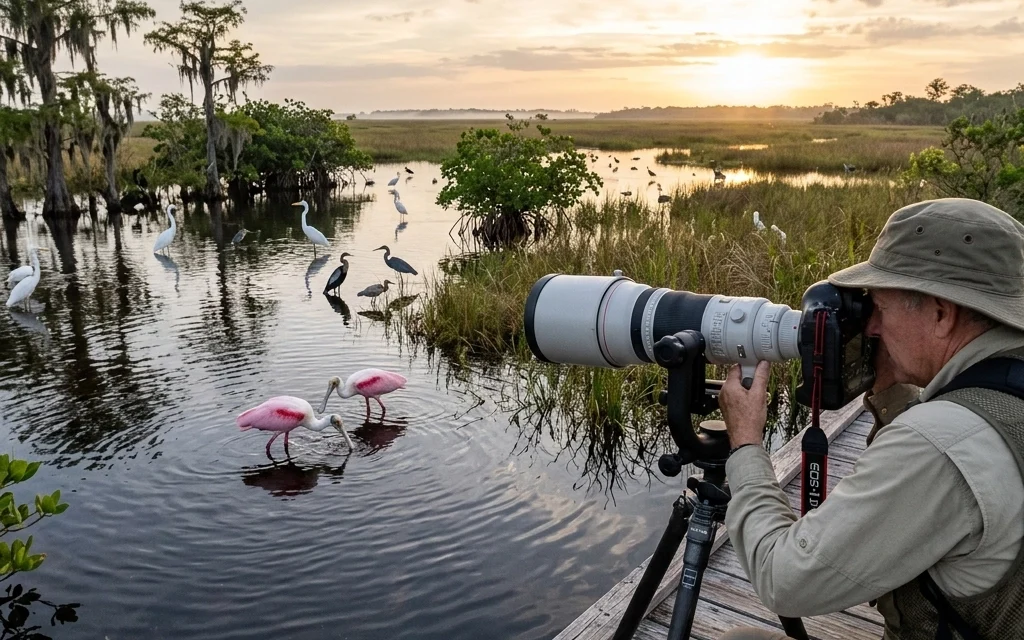
There is a specific kind of magic that happens in the Everglades just before the sun hits the horizon. The air is thick with the scent of sawgrass, the water is as still as a mirror, and the only sound you hear is the rhythmic "whoosh-whoosh" of a Great Blue Heron passing overhead. If you’ve never been, it’s hard to describe the scale of this place. It’s not just a swamp; it’s a living, breathing cathedral of wildlife.
For bird photographers, the Everglades is essentially the Holy Grail. With over 360 species of birds, it offers opportunities you simply won't find anywhere else in North America. But, like any world-class photography destination, it can be intimidating. Where do you go? What gear do you bring? How do you actually get those crisp, "National Geographic" style shots?
In this guide, I’m going to break down everything you need to know to make your next Everglades trip a success. And if you want to skip the trial and error and get straight to the best spots, you should definitely check out my Everglades Photography Guide. It’s the result of years spent navigating these waters and trails.
Why the Everglades is a Bird Photographer’s Paradise
The Everglades is a unique ecosystem known as the "River of Grass." Because the water is shallow and moves slowly, it creates the perfect feeding ground for wading birds. During the dry season, the water recedes into small pools, concentrating the fish: and the birds: into specific areas. This makes it incredibly easy to find subjects if you know where to look.
From the vibrant pink of the Roseate Spoonbill to the prehistoric look of the Wood Stork, the variety is staggering. But the best part? Many of these birds are relatively used to people, especially along the popular boardwalks. This allows you to get closer than you usually could in the wild, which is a game-changer for capturing detail.

Timing Your Visit: The Golden Rule
If you want the best photos, you have to play by the Everglades' rules.
Seasonality: The best time to visit is during the dry season, which typically runs from late November through April. This is when the migratory birds are in town, the mosquitoes are (mostly) gone, and the weather is actually pleasant. During the wet season (summer), the birds disperse because there is water everywhere, and the bugs will quite literally try to carry you away.
Time of Day: Sunrise is your best friend. Not only is the light soft and golden, but birds are most active during the first few hours of the day. They are hunting, preening, and flying between nesting sites. If you’re not at the park gates before the sun comes up, you’re missing the best part of the show.
Top Locations for Success
The Everglades is massive, but you don't need to wander aimlessly. Here are a few spots that never disappoint:
1. Anhinga Trail
Located near the Royal Palm Visitor Center, this is the best spot for beginners. The birds here are famous for being "approachable." You’ll see Anhingas drying their wings, Purple Gallinules walking on lily pads, and plenty of alligators to keep things interesting. It’s a great place to warm up and get used to your gear.
2. Mrazek Pond
This is a seasonal gem. During the height of the dry season (usually February to March), this pond becomes a feeding frenzy. As the water drops, hundreds of wading birds like Snowy Egrets and Roseate Spoonbills congregate here. It’s one of those places where you can stand in one spot and fill a memory card in an hour.
3. Shark Valley
If you want to see birds in the vast sawgrass prairies, Shark Valley is the place. You can rent a bike or take the tram, but for photography, I recommend walking or biking so you can stop whenever you see a Snail Kite or a Limpkin.

Gear Talk: What’s in the Bag?
You don’t need the most expensive gear in the world, but having the right tools makes a huge difference. If you’re looking for a deeper dive into the tech side of things, check out my essential photography gear list or look through the latest camera reviews 2024 to see what’s currently leading the pack.
- The Lens: For bird photography, reach is everything. A 100-400mm or 200-600mm zoom lens is perfect. It gives you the flexibility to shoot portraits but also zoom out for "birds in landscape" shots. If you have a prime 500mm or 600mm, bring it, but a zoom is often more practical in the thick of the action.
- The Body: A camera with a fast autofocus system and a good burst rate is ideal. Birds are fast, and you want to be able to track them in flight.
- Support: I’m a fan of monopod for the Everglades. It gives you the stability you need for heavy lenses but allows you to move quickly when a bird takes flight. If you prefer a tripod, make sure it has a gimbal head.
Technical Tips for Better Bird Photos
Capturing a bird is easy; capturing a great photo of a bird requires a little more finesse.
1. Master Your Shutter Speed
If you want to freeze the motion of wings in flight, you need a fast shutter speed. I usually recommend at least 1/2000s for birds in flight. If the bird is just perched, you can drop it down to 1/500s or 1/800s to keep your ISO lower.
2. Get Down to Their Level
One of the biggest mistakes photographers make is shooting from a standing position. If you’re photographing a bird on the ground or in the water, try to get as low as possible. Shooting at eye level creates a sense of intimacy and makes the background blur into a beautiful, creamy bokeh.
3. Focus on the Eye
If the eye isn't sharp, the photo is a throwaway. Most modern mirrorless cameras have "Animal Eye-AF," which is a lifesaver. If you don't have that, use a single-point focus and keep it locked on the eye.

Composition and Storytelling
Don't just take "identification shots." You know, those photos where the bird is just sitting there in the middle of the frame. Try to tell a story.
- Show the Environment: Sometimes, zooming out to show the bird surrounded by the vast sawgrass or cypress trees creates a much more powerful image.
- Wait for Action: The best photos are often the ones where the bird is doing something. Wait for them to catch a fish, preen their feathers, or interact with another bird. Patience is the most important piece of gear you own.
- The Light: Pay attention to where the sun is. Side-lighting can add drama and texture to feathers, while backlighting can create a beautiful "halo" effect.
Respect the Wildlife
This should go without saying, but it’s vital. We are guests in their home. Never feed the birds to get them closer, and never flush them (intentionally make them fly) just to get a flight shot. Not only is it unethical, but it stresses the animals out and ruins the experience for everyone else. Keep a respectful distance: that’s what your long lens is for!
For more on the ethics of wildlife photography and how we handle our photography booking experience, feel free to browse our site. We take conservation seriously at Photoguides.

Level Up Your Everglades Game
If you’re feeling overwhelmed, I totally get it. The Everglades is huge, and the conditions can change day to day. That’s exactly why I created the Everglades Photography Guide. It’s a digital roadmap that tells you exactly where to go, what time to be there, and what settings to use for specific shots.
Whether you are a seasoned pro or just picking up a camera for the first time, having a guide ensures you spend your time taking photos instead of driving around looking for them. You can also find more of my work and fine art prints over at Edin Fine Art if you’re looking for some inspiration before your trip.
The Everglades is waiting for you. It’s wild, it’s beautiful, and it’s one of the most rewarding places on Earth to point a camera. Pack your bags, grab your long lens, and I’ll see you out there in the sawgrass.
For more photography tips, gear discussions, and community insights, don't forget to visit Shut Your Aperture and stay tuned to the Photoguides Blog for more in our wildlife photography series.


