
Category: Photo Guides
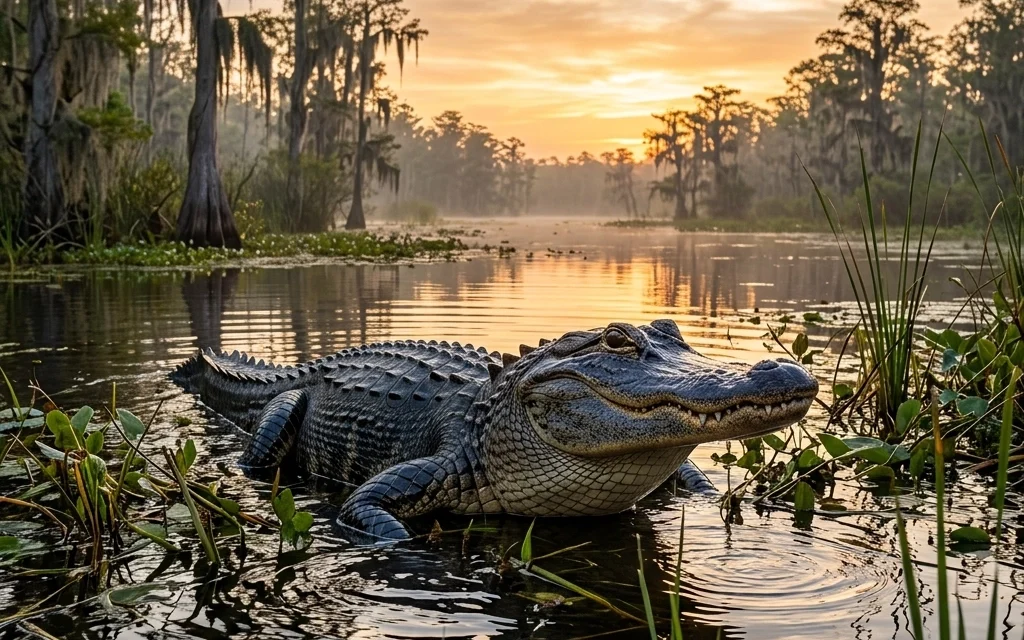
Everglades wildlife photography is one of those experiences that feels unreal the first time you do it, mist rising off the water at sunrise, birds exploding into flight, and alligators sunning themselves like they own the place (they kind of do). The best part? You don’t need a once-in-a-lifetime expedition to come home with portfolio-worthy images. You need a plan.
If you want the simplest, most reliable roadmap (locations, timing, what to shoot, and how to consistently get sharp, well-lit frames), grab the Everglades Photography Guide here: https://blog.edinchavez.com/product/everglades-photography-guide/. It’s built to help you waste less time guessing and spend more time shooting.
Everglades wildlife photography, in one sentence
You’re photographing wildlife in a massive wetland ecosystem where light changes fast, subjects can be close or far, and your results depend heavily on timing + positioning more than “secret settings.”
If you can show up at the right spot at the right hour, keep your shutter speed high, and stay calm when the action happens, you’ll do great.
What you can realistically photograph in the Everglades
The Everglades are a wildlife photographer’s dream because you get variety without needing to hike deep into the backcountry.
Birds (the main event)
Expect wading birds and water birds like:
- Great Blue Herons, Great Egrets, Snowy Egrets
- Tricolored Herons, Wood Storks, Anhingas, cormorants
- Purple Gallinules (a favorite), limpkins, bitterns
- Osprey and other raptors if you’re watching the skies
Reptiles and mammals
- American alligators (common and often close)
- American crocodiles (more likely around Flamingo)
- Turtles, snakes, and the occasional surprise mammal
Pro tip: if birds are your priority, focus on places with predictable perches, nesting activity, and consistent water. The guide breaks down the “why” behind each location so you’re not just wandering.
Best Everglades wildlife photography locations (the hits that actually deliver)
Here are the spots that consistently produce opportunities, especially if you’re visiting for the first time.
Anhinga Trail (Royal Palm Visitor Center)
If you only have time for one location, this is it.
Why it works:
- Boardwalk access = easy angles, stable footing
- Wildlife is often habituated to people (meaning closer shots)
- Tons of birds, plus alligators right beside the trail
You’ll find anhingas drying wings, herons hunting, and alligators drifting like logs. Bring your telephoto, but don’t be surprised if 200–400mm feels “long enough” here.

Shark Valley
Shark Valley is fantastic for:
- Alligators, turtles, and wading birds along the loop
- Cleaner sightlines for wildlife on the canal edges
- A panoramic observation tower that’s great for wide scenic shots
If you like a mix of wildlife and landscapes, this is a strong choice, especially at sunrise and late afternoon when the light is softer and warmer.
Wakodahatchee Wetlands (near Delray Beach)
Not inside the national park, but absolutely worth mentioning if you’re in South Florida for bird photography.
Why photographers love it:
- Busy bird activity, often at close range
- Boardwalk views, good backgrounds when positioned well
- Morning light can be excellent right after sunrise
Nesting season can be especially productive, expect drama, behavior, and lots of chances for storytelling images.
Big Cypress National Preserve (Loop Road)
This is where you go when you want that “old Florida” mood:
- Cypress domes, Spanish moss, reflections in still water
- Strong potential for owls and other less-common wildlife
- A slower pace that rewards patience
Big Cypress can feel less “guaranteed” than Anhinga Trail, but the atmosphere is unbeatable, and the best images here often look like fine art.
Flamingo (Everglades National Park)
Flamingo can be excellent for:
- Crocodiles, manatees, coastal birds
- Golden-hour light near water and docks
It’s also a great place to lean into environmental portraits, wildlife with context, not just tight headshots.
Pahayokee Overlook
This is more about the Everglades “feel”:
- Big skies, sawgrass, clean horizons
- Sunset can be incredible with a tripod and patience
If you want a landscape break between bird sessions, Pahayokee is a good reset.
The best time of day (and season) for Everglades wildlife photos
Time of day: sunrise wins
If you can only commit to one thing, commit to early mornings.
- Birds are active: feeding, calling, moving
- Wind tends to be calmer: better reflections, sharper frames
- Light is softer: less harsh contrast and fewer ugly shadows
A lot of people roll in mid-day, grab a few snapshots, and assume the Everglades are “tough to photograph.” They’re not, mid-day light just isn’t forgiving.
Season: dry season is often easier
When water is scarce, wildlife concentrates around remaining water sources. That usually means:
- More predictable bird activity
- Easier scouting (you’re not chasing subjects across endless flooded areas)
If you’re visiting during nesting months, you can also catch behavior and interaction, some of the most compelling wildlife storytelling you’ll ever photograph.
Essential gear for Everglades wildlife photography (what actually matters)
You don’t need to overcomplicate this, but you do need the basics dialed in.
Camera body
Any DSLR or mirrorless with:
- decent autofocus
- good burst shooting
- solid high-ISO performance
If you’re shopping or comparing bodies, you can browse our reviews area: https://photoguides.org/category/reviews
Lenses (recommended ranges)
- Telephoto: 200–600mm is the sweet spot
- 100–400mm works great on Anhinga Trail
- 500–600mm helps for smaller birds farther out
- Wide-angle: for landscapes, sunsets, and “place” shots
A simple two-lens setup (tele + wide) covers most Everglades scenarios.
For a bigger gear checklist (including small things people forget), this page can help: https://photoguides.org/essential-photography-gear
Support and protection
- Monopod (great for long lenses when walking)
- Tripod (best for sunset landscapes and low-light)
- Rain cover / dry bag (humidity + sudden rain is real)
- Lens cloth + blower (moisture and smudges happen fast)
- Extra batteries + memory cards (you’ll shoot more than you think)

Settings that work (starting points you can trust)
There’s no magic recipe, but these baselines will get you sharp keepers quickly.
For birds in motion
- Shutter speed: start at 1/1000s (faster if it’s flying fast)
- Aperture: f/5.6–f/8 (depends on your lens and light)
- Auto ISO: yes: let ISO float to protect shutter speed
- AF mode: continuous AF (tracking) + burst mode
For perched birds and portraits
- Shutter speed: 1/500s to 1/1000s (depending on focal length)
- Focus on the eye, always
- Watch your background: move your feet if the background is messy
For alligators and reptiles
- They can be still… until they aren’t.
- Use a shutter speed that covers surprise movement, especially if they’re in water.
For landscapes (sunrise/sunset)
- Tripod + slower shutter speeds
- Lower ISO for cleaner files
- Consider bracketing if the sky is bright and the foreground is dark
If you want a field-ready approach that ties locations + light direction + settings together, the Everglades Photography Guide is built exactly for that: https://blog.edinchavez.com/product/everglades-photography-guide/
Technique upgrades that make a huge difference (without new gear)
Get to eye level
The fastest way to improve your bird photos: shoot lower.
- Crouch or kneel (where safe and allowed)
- Use boardwalk railings carefully (don’t block others)
- Eye-level angles create more intimate, professional-looking images
Use light direction on purpose
Before you even raise the camera, ask:
- Is the sun behind me lighting the subject’s face?
- Am I shooting into harsh light that will silhouette everything?
Sometimes backlight can be beautiful: especially at golden hour: but it’s harder to nail when you’re learning. Start with light over your shoulder, then experiment.
Learn a few calls and behaviors
You don’t need to become a birder overnight, but recognizing “something is about to happen” is a superpower:
- alarm calls
- takeoff body language
- feeding patterns (repeatable movement paths)
That’s how you’re ready before the wings open.

Composition tips for stronger Everglades wildlife photos
Keep the frame clean
Busy reeds, harsh boardwalk clutter, and distracting highlights can ruin an otherwise great moment. Small moves help:
- step left/right for cleaner background
- shoot slightly higher/lower to reduce clutter
- wait for the subject to turn into better light
Tell a story when you can
Not every frame needs to be a tight portrait. Mix in:
- habitat shots (bird in environment)
- behavior (feeding, nesting, interaction)
- action (takeoff, landing, splash)
Those are the images people remember.
Watch catchlights and eyes
A sharp eye with a small catchlight feels alive. A soft eye looks like a miss: even if everything else is sharp.
Ethical wildlife photography in the Everglades (simple rules that protect the moment)
The Everglades are not a studio set. The best photos happen when wildlife stays relaxed and natural.
- Don’t approach nests or stress nesting birds
- Don’t feed wildlife (ever)
- Give alligators space: seriously
- Stay on trails and boardwalks
- Move slowly and let the subject settle
A calm animal behaves naturally. Natural behavior is where the best images come from.
A practical one-day Everglades photo plan (no overthinking)
If you want a straightforward schedule that works for most people:
Sunrise to mid-morning
- Anhinga Trail for close wildlife and bird activity
- Slow down, shoot behavior, wait for moments
Late morning / midday
- Scout, rest, clean gear, grab food
- If you’re still shooting, look for shade and calmer scenes (reptiles, perched birds)
Late afternoon to sunset
- Shark Valley for wildlife + tower views
- Or Pahayokee for sunset landscapes
- Or Flamingo if you’re targeting crocodiles/coastal light
And if you want the “plug-and-play” version: what to shoot where, when to arrive, what focal lengths usually work, and how to avoid the common dead zones: start here: https://blog.edinchavez.com/product/everglades-photography-guide/
Want more help beyond this post?
If you’re building your skills (and your keeper rate), it’s worth exploring additional learning resources and downloads:
- Educational posts: https://photoguides.org/category/educational
- Downloads: https://photoguides.org/download
For more photography work, prints, and creative projects, you can also check out:
- https://www.blog.edinchavez.com
- https://www.edinfineart.com
- Community + photography talk: https://www.shutyouraperture.com
The Everglades can feel wild and unpredictable at first: but once you understand the rhythm of light, water, and behavior, it becomes one of the most rewarding places in the U.S. to photograph wildlife.


