
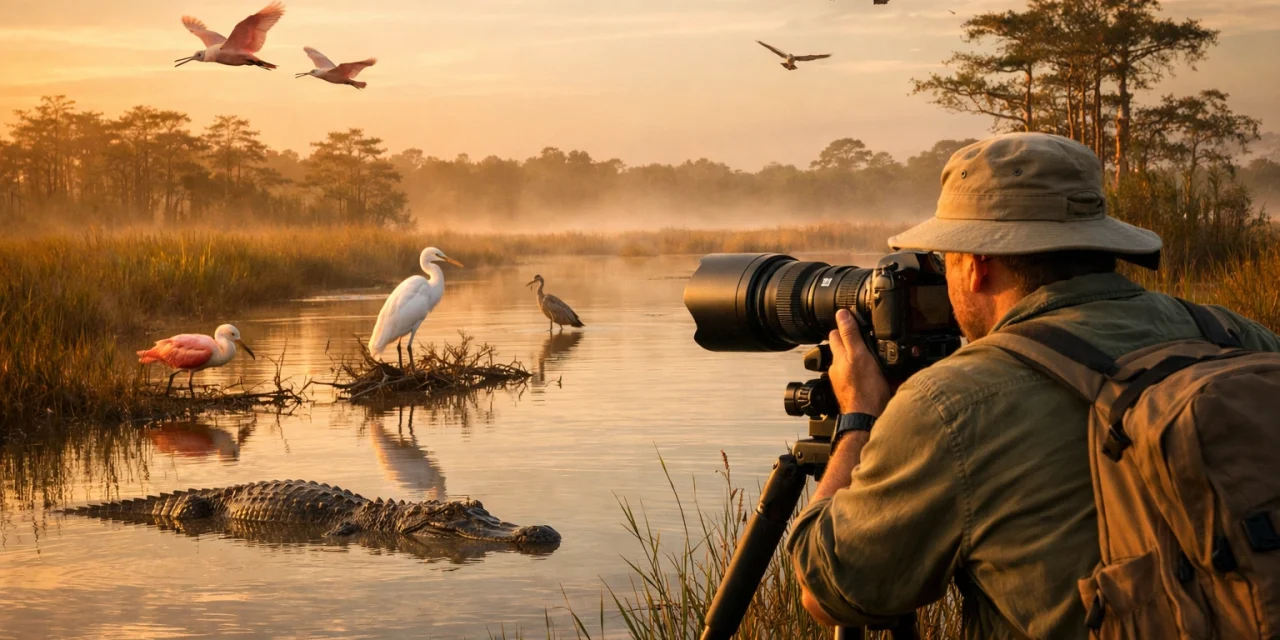
There’s something almost prehistoric about the Everglades. When you’re standing on a boardwalk at sunrise, watching the mist rise off the sawgrass while a Great Blue Heron stands motionless just feet away, you realize this isn't just a swamp: it’s a photographer’s paradise. But let’s be real: if you show up without a plan, the Everglades can be overwhelming. It’s huge, it’s humid, and the best shots aren't always where the tourists are gathered.
I’ve spent countless hours navigating these wetlands, and I want to help you skip the "learning the hard way" phase. Whether you’re looking to capture the intense gaze of an alligator or the vibrant pink of a Roseate Spoonbill, this guide will walk you through exactly what you need to succeed.
Why the Everglades is a Photographer’s Dream
The Everglades is one of the most unique ecosystems on the planet. It’s a "River of Grass" that moves so slowly you’d swear it’s standing still, creating a habitat for over 360 species of birds, rare mammals, and more reptiles than you can shake a tripod at.
For us photographers, it offers something rare: accessibility. Thanks to places like the Anhinga Trail, you can get professional-grade wildlife shots without needing to hike ten miles into the backcountry. But to really get those "wow" shots: the ones that look like they belong in a gallery: you need to know the rhythm of the park.
Before you head out, make sure you’re prepared with the right information. My Everglades Photography Guide is designed to take the guesswork out of your trip, providing specific GPS coordinates and seasonal tips that I’ve gathered over years of shooting.
Top Locations for Wildlife Photography
You could spend a month in the Everglades and still not see it all. If you’re on a tighter schedule, these are the spots you absolutely cannot miss.
1. The Anhinga Trail (Royal Palm)
This is the "Old Faithful" of the Everglades. Located near the Homestead entrance, this trail is a short boardwalk over a sawgrass marsh. It is, quite simply, the best place for beginners and pros alike. The animals here are incredibly accustomed to humans, which means you can get remarkably close (while still being safe and respectful). You’ll see Anhingas drying their wings, herons fishing, and alligators sunning themselves right on the edge of the path.
2. Shark Valley
Located off the Tamiami Trail (US-41), Shark Valley offers a 15-mile loop. You can rent a bike or take the tram, but for photography, I prefer biking or walking a portion of it. The observation tower at the halfway point gives you a killer panoramic view, but the real magic is along the canal where alligators and turtles congregate. It’s a fantastic spot for sunrise landscape-wildlife hybrids.

3. Loop Road (Big Cypress)
If you want a more "wild" feel, head to Loop Road in the Big Cypress National Preserve. It’s a bit more rugged and much less crowded. This is where I go when I’m looking for something different: maybe a Barred Owl perched in a cypress dome or even the elusive tracks of a Florida Panther. It’s dusty and slow-going, but the rewards are worth it.
Essential Gear for the Glades
You don’t need the most expensive gear in the world to get great shots, but you do need the right gear. The Everglades environment is harsh: it’s hot, humid, and salty near the coast.
Lenses: Reach is King
For bird photography, you really want something in the 300mm to 600mm range. A 100-400mm or a 200-600mm zoom is often the "sweet spot" because it gives you the flexibility to frame a bird in its environment or zoom in for a tight portrait of an alligator's eye. If you're looking for new glass, check out some of our camera reviews 2024 to see what’s performing best in the field.
Protection and Stability
- Polarizing Filters: These are non-negotiable. They cut the glare off the water and help you see "through" the surface to photograph fish or the submerged body of an alligator.
- Tripod/Monopod: Even with modern image stabilization, a monopod is a lifesaver when you're waiting for a heron to strike.
- Weather Sealing: The humidity here is no joke. Always carry a dry bag and some microfiber cloths. If you’re jumping from an air-conditioned car into the 90-degree humidity, your lens will fog up. Give it ten minutes to acclimate before you start shooting.
For a full breakdown of what I carry, take a look at my list of essential photography gear.

Professional Techniques for Stunning Wildlife Shots
Capturing a photo of a bird is easy. Capturing a story is much harder. Here are a few tips to elevate your work.
Get Down Low
The biggest mistake I see photographers make is shooting from eye level (their own eye level). To create an intimate connection with your subject, you need to get down to their eye level. If you’re photographing a Great Egret in the shallows, crouch down. It changes the perspective entirely, making the viewer feel like they are in the water with the bird.
Focus on the Eyes
This is photography 101, but it’s vital in wildlife. If the eye isn't sharp, the photo is a discard. Most modern mirrorless cameras have "Animal Eye-AF": use it! It’s a game-changer for those split-second moments when a bird takes flight.
Master the Light
The "Golden Hour" isn't just a cliché; it's a requirement in the Everglades. The light at mid-day is harsh and flattens the beautiful textures of the marsh. Aim to be at your location 30 minutes before sunrise. Not only is the light better, but the wildlife is significantly more active before the heat of the day kicks in.

What to Look For: Species Spotlight
Knowing your subject is half the battle. If you know how an animal behaves, you can predict the shot before it happens.
- The Roseate Spoonbill: These are the "pink stars" of the Everglades. They are most common in the winter months. Look for them in low-tide areas or coastal mangroves. Their vibrant color against the green mangroves is a classic Florida shot.
- The Anhinga: Known as the "Snake Bird," they swim with only their necks above water. After a dive, they’ll perch on a branch and spread their wings to dry. This "spread-wing" pose is iconic.
- Alligators and Crocodiles: The Everglades is the only place on Earth where both coexist. Look for the "bellowing" behavior during mating season (April-May): it creates incredible vibrations in the water that look amazing on camera.
If you’re interested in seeing how these subjects look in a professional fine art context, you can browse some of my work at Edin Fine Art.
Safety and Ethics in the Field
We are guests in their home. It’s easy to get caught up in the excitement of a shot, but ethics must come first.
- Keep Your Distance: Use your zoom lens, not your feet. If an animal changes its behavior because of you, you’re too close.
- Never Feed the Wildlife: This is especially true for alligators. A fed alligator is a dead alligator, as they become nuisances and eventually have to be removed.
- Pack It Out: Keep the Everglades pristine.

Timing Your Visit
The Everglades has two main seasons: Wet and Dry.
- The Dry Season (November – April): This is the best time for photography. As the water levels drop, wildlife congregates around the remaining deep-water holes, making them very easy to find. It’s also nesting season for many birds.
- The Wet Season (May – October): It’s buggy, hot, and the wildlife is more dispersed. However, if you can handle the mosquitoes, the afternoon thunderstorms provide some of the most dramatic landscape photography backdrops you'll ever see.
For more travel tips on visiting Florida and other regions, check out our Travel section.
Ready to Level Up Your Everglades Game?
Wildlife photography is a journey of patience, technical skill, and a little bit of luck. But you can tilt the odds in your favor. I created the Everglades Photography Guide to give you the exact roadmap I use when I’m out in the field. It covers everything from hidden trailheads to the best times of year for specific species.
The Everglades is waiting. Grab your gear, head out early, and remember to keep those eyes sharp and your shutter speed fast. For more tips, tutorials, and deep dives into the world of photography, be sure to visit the Photoguides Blog.
Happy shooting, and I'll see you out there in the sawgrass!


