
Category: Photo Guides
Let’s be honest: Universal Studios Hollywood is basically a giant, interactive playground designed to make your camera shutter cry with joy. But in 2026, with the park more crowded than ever and new lands popping up, getting that "perfect" shot requires more than just pointing your phone and hoping for the best. You need a plan. You need to know where the light hits the castle at 4:00 PM, and you definitely need to know which side of the tram to sit on if you want a face-to-face with a Great White shark.
Whether you’re rocking a high-end mirrorless rig or just the latest smartphone, this guide is here to help you navigate the hills of Hollywood like a pro. We’re talking about finding the best photography locations and secret photo spots that’ll make your followers think you had the whole park to yourself.
And look, if you’re still trying to figure out why your photos look a bit "meh," definitely check out our Mastering Photography: The Ultimate 2026 Guide for Every Skill Level. It’s the perfect foundation before you start dodging raptors for the gram.
The Iconic Entrance: The Globe and the Arch
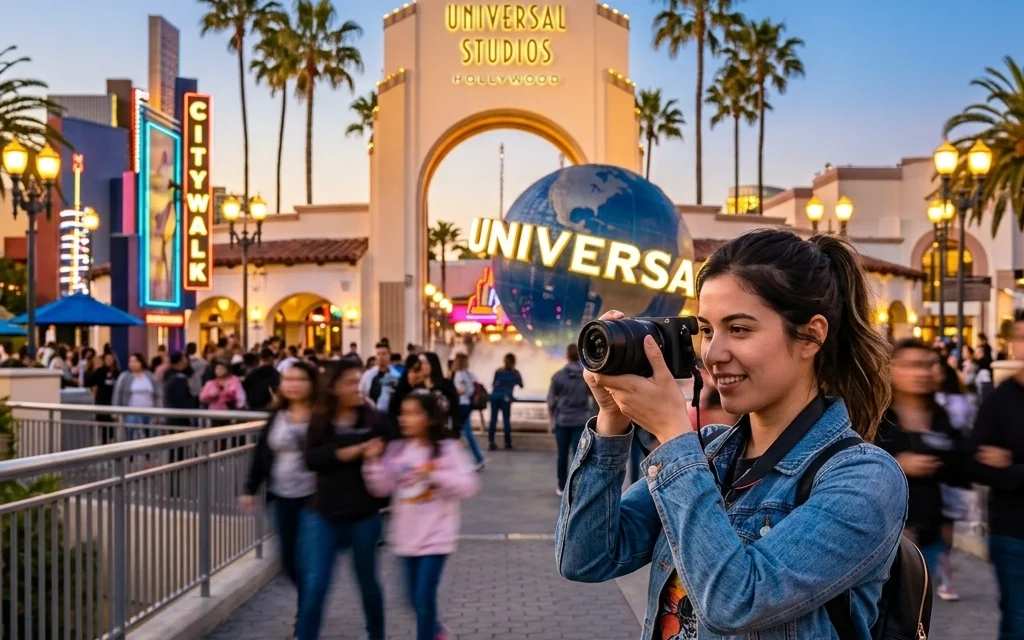
You can’t visit Universal without the "I was here" shot at the rotating Universal Globe. It’s the law. But here’s the thing: everyone and their grandmother is trying to get that same shot.
To get a clean photo of the globe without a hundred strangers in the background, you have two options. One: get there 30 minutes before the park opens. Two: wait until about an hour after the park officially "closes." The globe stays lit up long after the gates shut, and the crowds thin out significantly as people head toward CityWalk for dinner.
Pro Tip: Use a long exposure if you have a tripod (or a very steady hand/trash can to lean on). This will blur the moving people and leave the globe looking sharp and majestic. For more tips on long exposures and gear, take a peek at my friend Edin’s work over at Edin Chavez Blog.

Mastering the Wizarding World: Hogwarts & Hogsmeade
Stepping into The Wizarding World of Harry Potter feels like stepping directly into the celluloid. In 2026, the textures and details in Hogsmeade remain some of the most photogenic in any theme park worldwide.
Hogwarts Castle: For the absolute best angle of the castle, head toward the bridge near the Flight of the Hippogriff. You get a great profile of the school without the massive crowds that gather at the main entrance of the Forbidden Journey ride.
The Secret Reflection: Most people forget that there’s a body of water right next to the castle. If you position yourself correctly near the "Black Lake" area, you can get a stunning reflection shot of Hogwarts. This is especially killer during the "Golden Hour": that magical time just before sunset when the stone glows orange.
The Details: Don’t just focus on the big stuff. The shop windows in Hogsmeade are full of "Easter eggs." Use a wide aperture (low f-stop) to blur the background and focus on the moving displays in Honeydukes or the wands at Ollivanders. If you’re looking to upgrade your glass for these types of shots, check out Shut Your Aperture for some solid gear reviews.
Level Up: Super Nintendo World
If you want color, Super Nintendo World is your playground. It is quite literally a living cartoon. However, the bright, saturated colors can sometimes trick your camera’s sensor into overexposing.
Bowser’s Challenge: The entrance to the Mario Kart ride is a masterclass in lighting. The neon greens and deep purples are begging for a "Cyberpunk" edit.
The High Ground: To get a panoramic shot of the entire land, head to the stairs leading up to the second level. From here, you can see the Piranha Plants, the spinning coins, and the crowds below. It’s one of the best photography locations for showing the sheer scale of the Mushroom Kingdom.
Interact with the Art: If you have a Power-Up Band, use it! Photos of people interacting with the blocks or playing the mini-games feel much more "alive" than just standing and smiling.

Survival of the Fittest: Jurassic World
The Jurassic World area offers a completely different vibe: lush greenery, industrial steel, and, of course, giant dinosaurs.
The Raptor Encounter: This is arguably the best character photo op in the park. The handlers are great, and the Raptors (Blue and her sisters) are incredibly detailed. To get the best shot, switch your camera to "Burst Mode." The Raptors move fast and unpredictably, and you want to catch that split second where they look like they’re about to take a bite out of your shoulder.
The Drop: If you’re brave enough to bring your camera (or a waterproof GoPro) near the Jurassic World ride, try to catch the splashdown from the viewing bridge. Use a fast shutter speed (at least 1/1000s) to freeze the water droplets in mid-air. It’s a classic action shot that never gets old.

Lights, Camera, Tram: The World-Famous Studio Tour
The Studio Tour is the heart of Universal Studios Hollywood. It’s a 60-minute journey through movie history, and it’s packed with photo spots.
The Jaws Encounter: Pro tip: sit on the right-hand side of the tram. When you pull into Amity Island, the shark is going to lung out of the water right next to the tram. If you’re on the left, you’ll just be photographing the back of someone’s head.
Bates Motel: As the tram passes the Psycho House and the Bates Motel, keep your eyes peeled. Sometimes "Norman" is outside with a kitchen knife. It’s a quick moment, so have your camera ready and your ISO bumped up if it’s a cloudy day or late afternoon.
Picture Cars: You’ll pass the cars from Fast & Furious, Back to the Future, and Jurassic Park. These are great for quick snapshots, but since the tram is moving, make sure your shutter speed is high to avoid motion blur. If you want to see how the pros handle moving shots and cinematic landscapes, check out the gallery at Edin Fine Art.

The Low-Budget Pro: Gear and Timing Tips
You don't need a $5,000 setup to get amazing photos at Universal. In 2026, smartphone computational photography is mind-blowing. Here’s how to maximize what you have:
- Lighten the Load: You’re going to be walking a lot. Universal is built on a hill (the "Upper Lot" and "Lower Lot" are connected by massive escalators). Don't bring a huge bag. A single versatile lens (like a 24-70mm) is usually all you need. Check our list of essential photography gear for our top lightweight recommendations.
- Timing is Everything: Theme park lighting is harsh at midday. Spend the middle of the day doing the indoor rides or eating (The Toadstool Cafe has some great-looking food, by the way). Save your serious shooting for the first two hours of the day and the last two hours.
- The "No-Cost" Characters: You don't always need to pay for a "photo package." Characters like the Minions, Scooby-Doo, and Marilyn Monroe wander the Upper Lot. They are happy to pose for a photo on your own device for free!
- Edit for the Vibe: Universal has distinct "looks." Warm and moody for Harry Potter, bright and "poppy" for Nintendo, and cinematic/gritty for the Studio Tour. Use apps like Lightroom Mobile to create presets for each area.
If you’re planning a trip and want to make sure you’ve got your tickets and transport sorted without the headache, I highly recommend booking through Viator. It saves a ton of time that you could be using to line up your next shot.

Final Thoughts
Universal Studios Hollywood in 2026 is a masterclass in immersive design. Every corner is a potential masterpiece, from the neon lights of King Kong near CityWalk to the snow-capped chimneys of Hogsmeade. The trick to capturing "Movie Magic" isn't about having the most expensive camera; it's about seeing the light, finding the unique angles, and maybe being a little patient when a group of teenagers decides to have a 20-minute TikTok dance session in front of your shot.
Photography is about storytelling. When you look back at your photos from Universal, you want them to feel like stills from a movie. So, charge those batteries, clear your memory cards, and go find your own Hollywood ending.
Happy shooting!


