
Category: Photo Guides
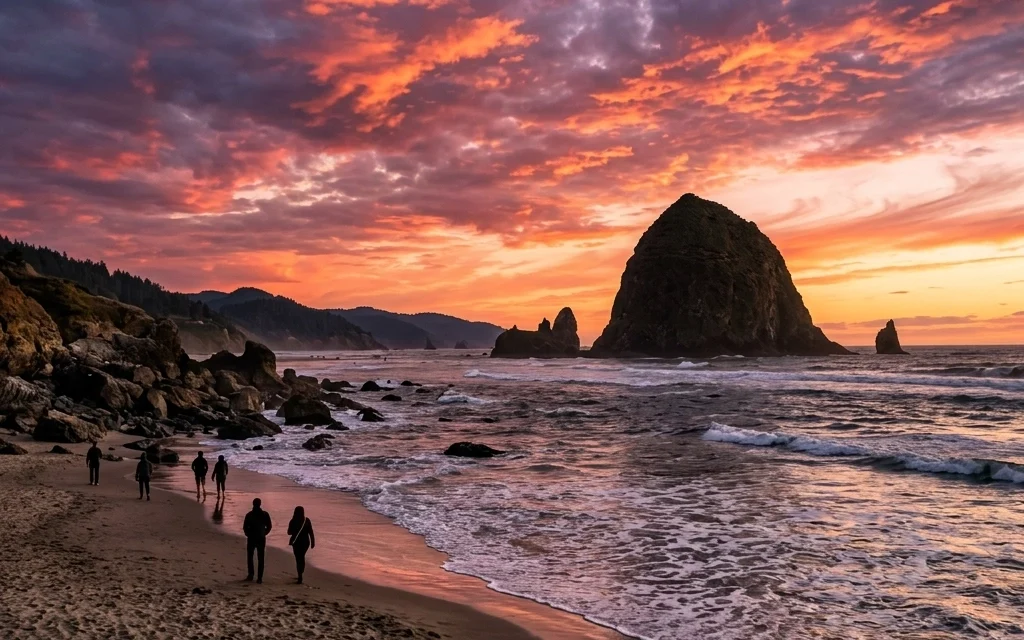
We’ve all been there. You hike for two hours, set up your tripod, dial in your settings, and wait for that "fire in the sky" moment, only for the clouds to turn a dull, muddy grey. It’s one of the most frustrating parts of being a landscape photographer. You have a beautiful foreground, a perfect composition, but the sky just isn't cooperating.
In the past, fixing a boring sky meant hours of tedious masking in Photoshop, trying to paint around every tiny tree branch and mountain peak. But things have changed. As part of our deep dive into why Luminar Neo is currently the premier editing software for modern photographers, I want to show you how to turn those "meh" shots into "wow" shots in literally five minutes.
Using the Sky AI tool, we’re going to transform a flat horizon into an epic sunset that looks completely natural.
Why Luminar Neo is the Best in Class
Before we jump into the "how-to," let’s talk about the "why." There are a lot of editors out there, but Luminar Neo’s engine is specifically built to handle complex lighting scenarios. When you swap a sky, you aren't just pasting a new image on top of an old one. You have to account for how that new light source: in this case, a vibrant sunset: would actually hit the ground, the water, and the subjects in your frame.
Luminar Neo’s Sky AI doesn't just mask the sky; it relights the entire scene. It’s this level of intelligence that puts it leagues ahead of the competition. If you’re looking to level up your workflow, you can check out more tips in our educational section or see our deep-dive camera reviews to see how different sensors handle these edits.
Step 1: The One-Click Sky Replacement
The heart of this process is the Sky AI tool. Once you’ve opened your image in Luminar Neo, head over to the Edit tab and look for the Creative section.
- Select Sky AI: Click on the tool to open the dropdown menu.
- Choose Your Sky: Luminar comes pre-loaded with a library of high-resolution skies. For an epic sunset, look for the "Dramatic Sunset" or "Sunset" categories.
- The Magic Happens: As soon as you click a sky, the AI analyzes the image, finds the horizon, creates a pixel-perfect mask, and drops the new sky in.
The tech is so smart that it can even detect the space between leaves on a tree. If you want to expand your library even further, you can always download custom sky overlays to keep your portfolio looking unique.

Alt Text: A split-screen comparison showing a raw landscape photo with a flat white sky on the left, and a vibrant, multi-colored sunset replacement on the right using Luminar Neo Sky AI, demonstrating seamless masking around complex tree branches.
Step 2: Aligning the Horizon
Even though the AI is incredibly accurate, every photo is different. Sometimes the horizon needs a little nudge to look believable.
In the Sky Orientation settings, you’ll find sliders for Vertical Position, Horizontal Position, and Flip. If your original photo was taken from a low angle, you might need to shift the sky up or down to match the perspective. The goal here is to make sure the sun in the sky matches the logic of the shadows in your foreground.
I always tell my students over at Shut Your Aperture that believability is the most important part of AI editing. If the light is coming from the left in your sky but your foreground shadows are falling to the left, the human brain will immediately know something is "off."
Step 3: Scenery Relighting (The Secret Sauce)
This is where Luminar Neo leaves other editors in the dust. When you drop a glowing orange sunset into a photo that was originally shot under blue, midday light, the colors won't match. The foreground will look too cold.
Inside the Sky AI tool, open the Scenery Relighting settings:
- Relight Amount: This determines how much of the new sky’s color is "splashed" onto your foreground. For sunsets, I usually pull this up to about 50-70.
- Relight Saturation: This controls the intensity of that color.
- Relight Human: If you have people in your shot, this slider ensures their skin tones don't turn a weird shade of orange while still allowing the sunset glow to hit their clothes and hair.
By adjusting these, you’re essentially "re-shooting" the photo at a different time of day. It’s incredibly powerful for creating a cohesive look.

Alt Text: A close-up screenshot of the Luminar Neo interface highlighting the Scenery Relighting sliders, showing how the warm orange glow of a sunset is being applied to rocks and grass in the foreground of a landscape photo.
Step 4: Perfecting the Blend with Landscape Tools
To really sell the "Epic Sunset" look, I like to step outside of the Sky AI tool for a moment and head over to the Landscape toolset.
One of my favorite tricks is using the Golden Hour slider. Since we’ve just added a sunset, adding a touch of Golden Hour (usually around 60 on the slider) helps tie the whole image together by warming up the midtones and highlights.
If your sunset feels a bit too "crunchy" or sharp, you can also use the Atmosphere AI tool to add a bit of haze or mist. This creates depth and makes the sky feel like it’s miles away, rather than a flat backdrop. For more on creating depth in your shots, you can read my personal blog posts over at Edin Chavez Blog.
Step 5: Handling Water and Reflections
If your photo features a lake, the ocean, or even a puddle, you need a reflection. A sunset sky without a corresponding reflection in the water is a dead giveaway that the photo was edited.
Luckily, Luminar Neo handles this automatically. In the Reflection settings within Sky AI, you can adjust the Reflection Amount. If the water is choppy, use the Water Blur slider to make the reflection look more realistic. This attention to detail is why I personally use this software for my fine art prints.

Alt Text: A breathtaking landscape photo of a mountain reflected in a still lake at sunset, showing how Luminar Neo Sky AI automatically generates a matching reflection of the new orange sky in the water with realistic ripples.
Cleaning Up the Frame with GenErase
Sometimes, an epic sunset reveals things in your foreground that you didn't notice before: like a stray trash can, a distracting power line, or a tourist who wouldn't move out of the frame.
Before you export your masterpiece, use the GenErase tool. This is a generative AI feature in Luminar Neo that doesn't just "clone" pixels; it actually understands what should be there and replaces the distraction with a texture that matches the surroundings. It’s the final polish every professional-grade photo needs.
Final Thoughts: The 5-Minute Masterpiece
Photography is about capturing emotion, and nothing evokes emotion quite like a stunning sunset. While we all strive to get it right in the camera, the reality of travel and weather doesn't always play fair. Whether you're shooting hidden speakeasies in Miami or the rugged peaks of a National Park, having the tools to fix a missed opportunity is invaluable.
Luminar Neo makes this process accessible to everyone. You don't need a degree in digital art to create something beautiful. By using Sky AI, Relight AI, and the Landscape tools, you can take a discarded raw file and turn it into the centerpiece of your portfolio in under five minutes.
Ready to try it for yourself? You can download Luminar Neo here and start transforming your own images today. If you're looking for more gear advice to pair with your new editing skills, don't miss our guide on essential photography gear.

Alt Text: A wide-angle landscape shot of a desert canyon at sunset, showcasing vibrant purple and orange clouds, deep shadows, and a warm glow across the canyon walls, edited entirely in Luminar Neo.
Happy shooting, and even happier editing! The best part of this journey is seeing what you can create when the technical barriers are removed. Go out there and make something epic.


