
Category: Photo Guides
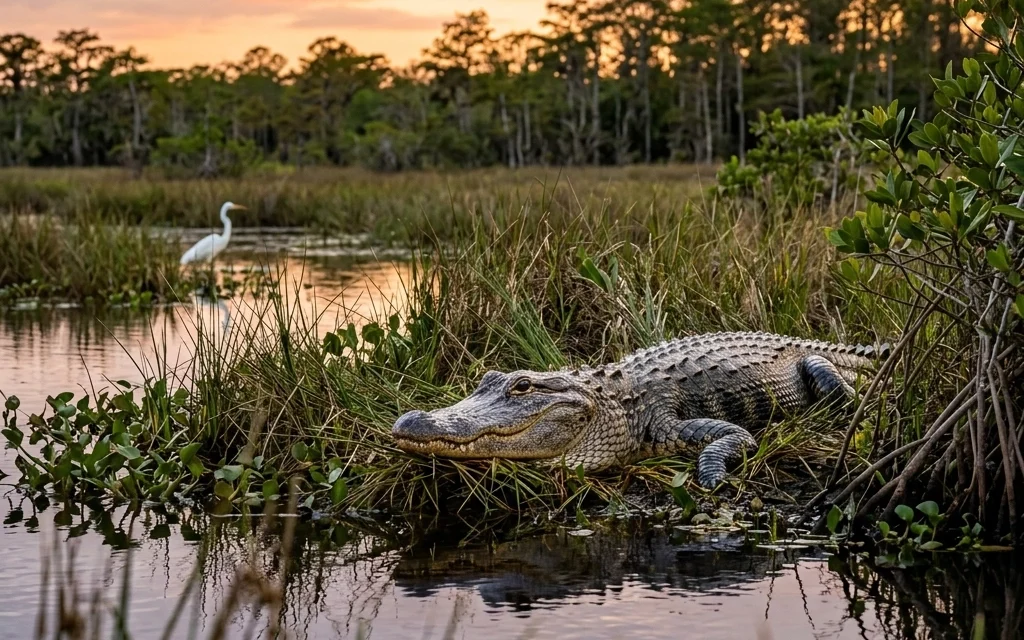
There is something almost prehistoric about the Florida Everglades. When you’re standing on a boardwalk at sunrise, the mist rising off the "River of Grass" and the distant, guttural bellow of an alligator echoing through the cypress trees, you don't just feel like a photographer: you feel like an explorer.
If you’ve recently picked up a camera and are looking for the ultimate training ground to sharpen your skills, there is no place on Earth quite like the Everglades. It’s accessible, it’s vibrant, and quite frankly, it’s one of my favorite places to lead photography booking experiences.
But I’ll be honest: the Everglades can be intimidating for beginners. It’s huge, it’s hot, and the wildlife can be elusive if you don’t know where to look. That’s why I’ve put together this beginner’s guide to help you master the glades. Whether you’re here for the iconic Great Blue Herons or the elusive Florida Panther (good luck with that one!), this guide will get you started on the right foot.
Why the Everglades is the Perfect Classroom
Most people think they need to fly to Africa or trek through the Amazon to get world-class wildlife shots. The truth? The Everglades offers some of the best bird and reptile photography in the world, often just a few feet from your car.
What makes it perfect for beginners is the "accessibility" factor. Many animals near the popular visitor centers have become accustomed to humans. They aren't "tame," but they aren't as skittish as wildlife in more remote areas. This gives you the unique opportunity to practice your composition and technical settings without the pressure of a subject disappearing the second you click the shutter.
To really dive deep into the specific spots and seasonal movements, you should definitely check out my Everglades Photography Guide. It’s the culmination of years spent in these swamps, designed to save you time and get you straight to the action.
Essential Gear for the Glades
You don’t need a $10,000 setup to get great shots, but you do need the right tools for the job. Wildlife photography is all about reach and speed.
1. The Telephoto Lens
This is non-negotiable. While you can get surprisingly close to some birds, a telephoto lens allows you to capture intimate portraits without disturbing the animals. For beginners, I highly recommend a 150-600mm zoom lens. It’s versatile enough to capture a wide-angle scene of a landscape and then zoom in tight on a Snail Kite in the blink of an eye. If you're looking for more recommendations, see our list of essential photography gear.
2. Support Systems
While many modern lenses have great stabilization, a tripod or monopod can be a lifesaver during those long waits for a bird to take flight. However, in the Everglades, mobility is often key. If you’re hiking the trails, a sturdy monopod is a great middle ground.
3. Protection (For You and the Gear)
The Florida sun and humidity are no joke. Bring a rain cover for your camera: afternoon thunderstorms are a staple here. And for yourself? Wear long sleeves, a hat, and more bug spray than you think you need.

Nailing Your Camera Settings
Wildlife doesn’t wait for you to find the right button. You need to have your "base settings" ready before you even step onto the trail.
- Shutter Speed: This is the most important setting for wildlife. To freeze the motion of a bird in flight, you want a shutter speed of at least 1/1000s or higher. If you’re shooting an alligator basking in the sun, you can drop it down, but always be ready for sudden movement.
- Aperture: I usually recommend shooting "wide open" (your lowest f-stop number, like f/5.6 or f/6.3) to create that beautiful blurry background that makes the subject pop.
- Focus Mode: Use Continuous Autofocus (AF-C or Al Servo). This allows your camera to track the subject as it moves. If your camera has "Animal Eye-AF," turn it on. Focus on the eye: always the eye.
For more deep dives into technical gear and tutorials, I always suggest checking out Shut Your Aperture for some great community insights and gear reviews.
Where to Go: The "Training Wheels" Trails
If it’s your first time, don’t try to bushwhack into the deep swamp. Start where the wildlife is plentiful and easy to spot.
Anhinga Trail (Royal Palm)
This is the gold standard for beginner photography. It’s a paved boardwalk where the animals are incredibly "chill." You’ll see Anhingas drying their wings, Egrets hunting in the shallows, and more alligators than you can count. It’s the perfect place to practice your educational photography techniques in a low-stress environment.
Shark Valley
Known for its 15-mile loop, Shark Valley is fantastic for seeing large numbers of alligators and birds like the Roseate Spoonbill. I recommend renting a bike or taking the tram to get to the observation tower, which offers a stunning panoramic view of the park.
Loop Road
If you’re feeling a bit more adventurous, Loop Road offers a more rugged experience. It’s a dirt road off Tamiami Trail where you can often find Barred Owls and hawks perched in the cypress trees. Just keep an eye on your tires!

Composition: Telling a Story
A "good" photo is a sharp image of a bird. A "great" photo tells a story. When you’re out in the Everglades, don’t just point and shoot.
Try to get down to the animal's eye level. If you’re shooting a heron, don’t shoot from a standing position looking down. Crouch down (safely!). Getting on their level creates a sense of intimacy and makes the viewer feel like they are part of the bird's world.
Also, pay attention to the background. The Everglades can be "busy" with sticks, grass, and reflections. Move yourself a few inches to the left or right to find a cleaner background that doesn't distract from your subject. You can see examples of this kind of storytelling in my fine art collection at Edin Fine Art.
Safety and Ethics
We are guests in their home. Reassuringly, the Everglades is a safe place if you follow the rules.
- Keep your distance: The National Park Service recommends staying at least 15 feet away from alligators and even further from nesting birds.
- Never feed the wildlife: This is the quickest way to put an animal (and yourself) in danger.
- Stay on the trails: The ecosystem is fragile. Staying on the boardwalks protects the plants and keeps you away from hidden holes in the limestone.

Taking the Next Step
Reading about the Everglades is one thing, but being there when the light hits the sawgrass just right is another. If you want to skip the trial-and-error phase and start taking professional-grade photos immediately, I highly recommend downloading the Everglades Photography Guide.
I’ve mapped out the best times of day for specific locations, where to find the rarest birds, and how to navigate the park like a pro. It’s basically like having me in your pocket while you explore.
Wildlife photography is a journey of patience. You might spend four hours standing in the sun for one perfect thirty-second window of action, but when you look at the back of your camera and see that perfect shot, I promise you: it’s worth every second.
For more inspiration on where to take your camera next, check out my other posts on Edin Chavez’s Blog or explore some cheap weekend getaways to keep the adventure going.
Happy shooting, and I’ll see you out in the swamp!


