
Category: Photo Guides
There is something almost prehistoric about the Everglades. When you’re standing on a boardwalk at sunrise, surrounded by the chorus of thousands of birds and the occasional low grunt of an alligator, you realize this isn't just a swamp: it’s one of the most vibrant biological theaters on the planet. For a photographer, it’s a paradise, but it can also be incredibly overwhelming.
If you’ve ever tried to track a Roseate Spoonbill as it streaks across a bright pink sky, or tried to find focus on a camouflaged Bittern hidden in the sawgrass, you know that Everglades bird photography requires more than just a decent camera. It requires patience, the right timing, and a bit of "inside baseball" knowledge to truly walk away with gallery-quality shots.
Whether you are a seasoned pro or picking up a long lens for the first time, this guide is designed to help you navigate the "River of Grass" and capture the incredible avian life that calls it home. And if you want the absolute deepest dive into these locations, don't forget to check out our Everglades Photography Guide which breaks down every secret spot I’ve found over the years.
Understanding the Seasons: When to Visit
In Florida, we don’t really have four seasons; we have "Wet" and "Dry." If you show up at the wrong time, your experience will be vastly different.
The Dry Season (November – April)
This is the "Golden Age" for bird photography in the Everglades. As the water levels across the state drop, the fish are forced into smaller, concentrated pools. For the birds, this is an all-you-can-eat buffet. For us, it means thousands of birds are gathered in predictable locations. The weather is also much more manageable: fewer mosquitoes and lower humidity make those 5:00 AM wake-up calls a lot easier to handle.
The Wet Season (May – October)
The water rises, the heat kicks in, and the mosquitoes move from "nuisance" to "legitimate threat." During this time, birds disperse across the massive landscape because they can find food anywhere. Photography becomes much more challenging, though you can get some incredible dramatic storm clouds and lush, green landscapes.

Essential Gear for the Glades
You don't need the most expensive kit in the world to get great shots, but you do need gear that can handle the specific demands of wildlife photography.
- Reach is King: Most birds in the Everglades are surprisingly comfortable with humans, but you still want focal length. A lens in the 200-600mm or 150-600mm range is the sweet spot. It allows you to get those tight portraits without disturbing the animal’s natural behavior. If you’re looking for a new setup, I always recommend checking out essential photography gear lists to see what fits your budget.
- Stability: While modern stabilization is great, a long day of holding a 600mm lens will wear you out. A sturdy tripod with a gimbal head is a game-changer. It allows you to track birds in flight effortlessly while taking the weight off your shoulders.
- Protection: Florida is humid. Very humid. I always keep a few microfiber cloths in my pocket and a rain cover in my bag. If you’re coming from an air-conditioned car into the Florida heat, your lens will fog up. Give it 15 minutes to acclimate before you expect to hit the shutter.
- The "Walk-Around" Lens: Don't forget a wider lens (like a 24-70mm) for those moments when the landscape is just too beautiful to ignore. You can see some of my favorite environmental bird shots over at Edin Fine Art.
Camera Settings That Actually Work
If you want to move beyond snapshots, you need to master your settings. Birds move fast, and the light in the Everglades can be tricky with all the reflections off the water.
- Shutter Speed: For birds in flight (BIF), don’t settle for less than 1/2000s. Even if the bird looks like it’s just gliding, their wing tips move faster than you think. For perched birds, you can drop down to 1/800s to keep your ISO lower.
- Aperture: I usually shoot wide open (f/4 or f/5.6) to create that beautiful, creamy background (bokeh). This helps the bird "pop" against the often busy mangrove branches.
- Auto-ISO: Light changes fast when a bird flies from the shade of a cypress tree into the open sun. Using Auto-ISO with a manual shutter and aperture allows the camera to handle the exposure compensation while you focus on the composition.
- Focus Mode: Use Continuous AF (AF-C or AI Servo). If your camera has bird-eye detection, turn it on: it’s a total life-saver for keeping the eye sharp.
For more technical breakdowns on the latest bodies, take a look at our camera reviews 2024 section.

Top Locations for Birding
While the entire park is a "hot zone," there are a few legendary spots that every photographer should visit.
Anhinga Trail (Royal Palm)
This is arguably the most famous birding trail in the world. It’s a boardwalk where the wildlife is incredibly habituated to people. You’ll see Anhingas drying their wings, Great Blue Herons hunting just feet away, and more alligators than you can count. It’s the perfect place to practice your technique.
Shark Valley
Located off the Tamiami Trail, Shark Valley offers a 15-mile loop. You can rent a bike or take the tram. The "low-to-the-ground" perspective you get while biking is fantastic for capturing Wood Storks and Roseate Spoonbills in the canals lining the path.
Eco Pond (Flamingo)
Right at the end of the main park road is Flamingo. Eco Pond is a haven for waterfowl and the elusive Roseate Spoonbill. The light here at sunset is nothing short of magical.
For a smoother trip, I always suggest looking into the photography booking experience if you're interested in a guided tour that takes the guesswork out of where to go.
Compositional Secrets: The "Eye-Level" Rule
The biggest mistake I see beginners make is shooting from a standing position. When you shoot "down" at a bird in the water, it looks like a person taking a photo of a bird. But when you get down to eye level, you enter their world.
Getting low creates a much more intimate connection between the viewer and the subject. It also blurs the foreground and background more effectively, giving your shots that professional "National Geographic" look. If you can’t get on the ground, look for boardwalks that are naturally closer to the water level.

Lighting and the "Sun Angle"
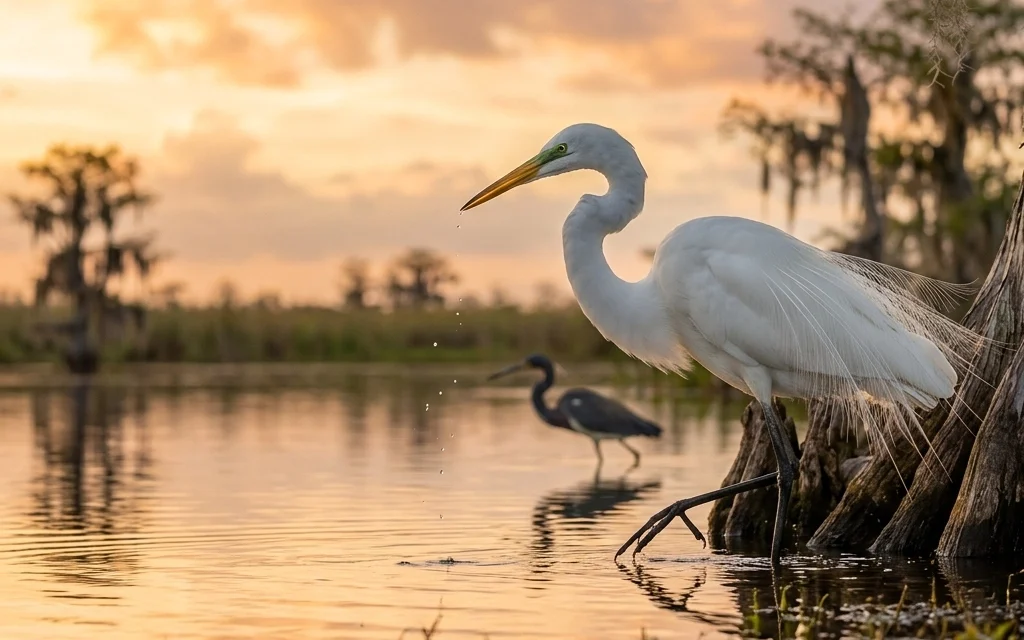
In the Everglades, the sun is your best friend and your worst enemy. Because of the white feathers on many Florida birds (Great Egrets, White Ibises), it’s incredibly easy to "blow out" the highlights, losing all the detail in the feathers.
Pro Tip: Keep the sun directly behind you. This is called "shooting on the shadows." By keeping your shadow pointed directly at the bird, you ensure the subject is evenly lit, which helps your camera's sensor capture the maximum amount of detail.
If you’re struggling with harsh light, you can always learn some post-processing tricks in our educational category to help recover those highlights.
Ethics and Wildlife Safety
We are guests in their home. It’s easy to get caught up in the "hunt" for the perfect shot, but the bird’s well-being always comes first.
- Never feed the wildlife. It changes their behavior and puts them (and you) at risk.
- Maintain distance. If a bird stops what it’s doing and starts watching you, you’re too close. Back up and let them return to their natural behavior.
- Watch the nest. During nesting season, keep your distance from rookeries. Stressing a parent can lead them to abandon the nest, leaving chicks vulnerable to predators.

Mastering the Everglades
Everglades photography is a marathon, not a sprint. You might spend four hours standing in the heat for a thirty-second window of action. But when that Osprey dives into the water or that Barred Owl looks directly into your lens, every drop of sweat is worth it.
If you’re serious about making the most of your trip and want to know exactly where to go, what time to be there, and how to dial in your settings for specific species, I’ve put everything I know into the Everglades Photography Guide. It’s designed to save you days of scouting and get you straight to the action.
For more inspiration on what’s possible with a camera and a little bit of Florida sun, check out my latest work on my main blog or join the conversation with other gear enthusiasts over at Shut Your Aperture.
The birds are waiting. Grab your gear, get out there, and remember to keep that shutter speed high!


